-
Improvement
-
Resolution: Fixed
-
") Blocker
Blocker
-
Future Dev
-
MOODLE_500_STABLE
-
MDL-83006-main -
Initial setup
- Login as admin.
- Restore the attach course backup-moodle2-course-2-c1-20240826-0815-nu.mbz

- Clear all curlsecurityblockedhosts and curlsecurityallowedport settings.
- Setup local Ollama instance: https://github.com/ollama/ollama. For instance, if you want to run your local Ollama instance using docker:
docker run -d -v ollama:/root/.ollama -p 11434:11434 --name ollama ollama/ollama - Pull llama3.2 and phi4 model. If you run your local Ollama instance with docker:
docker exec -it ollama ollama run llama3.2docker exec -it ollama ollama run phi4 - Login as admin.
- Go to AI > AI placements and enable Text editor placement.
- Go to AI > AI providers and disable other providers (OpenAI, Azure...)
- Enable the Ollama provider.
Testing scenario 1: Text generation
- Go to AI > AI providers and click Setting for Ollama.
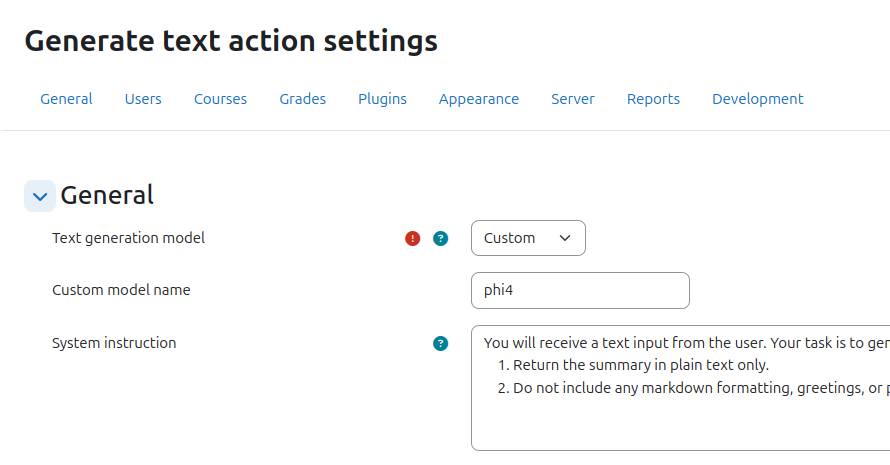
- Click on the Settings link for action Generate text.
- Use the Custom model.
- Enter llama3.2 to Custom model name.
- Save changes.
- Edit your profile.
- Click on the AI button in the TinyMCE text editor.
- Select AI Generate Text.
- Agree with the Policy (If any).
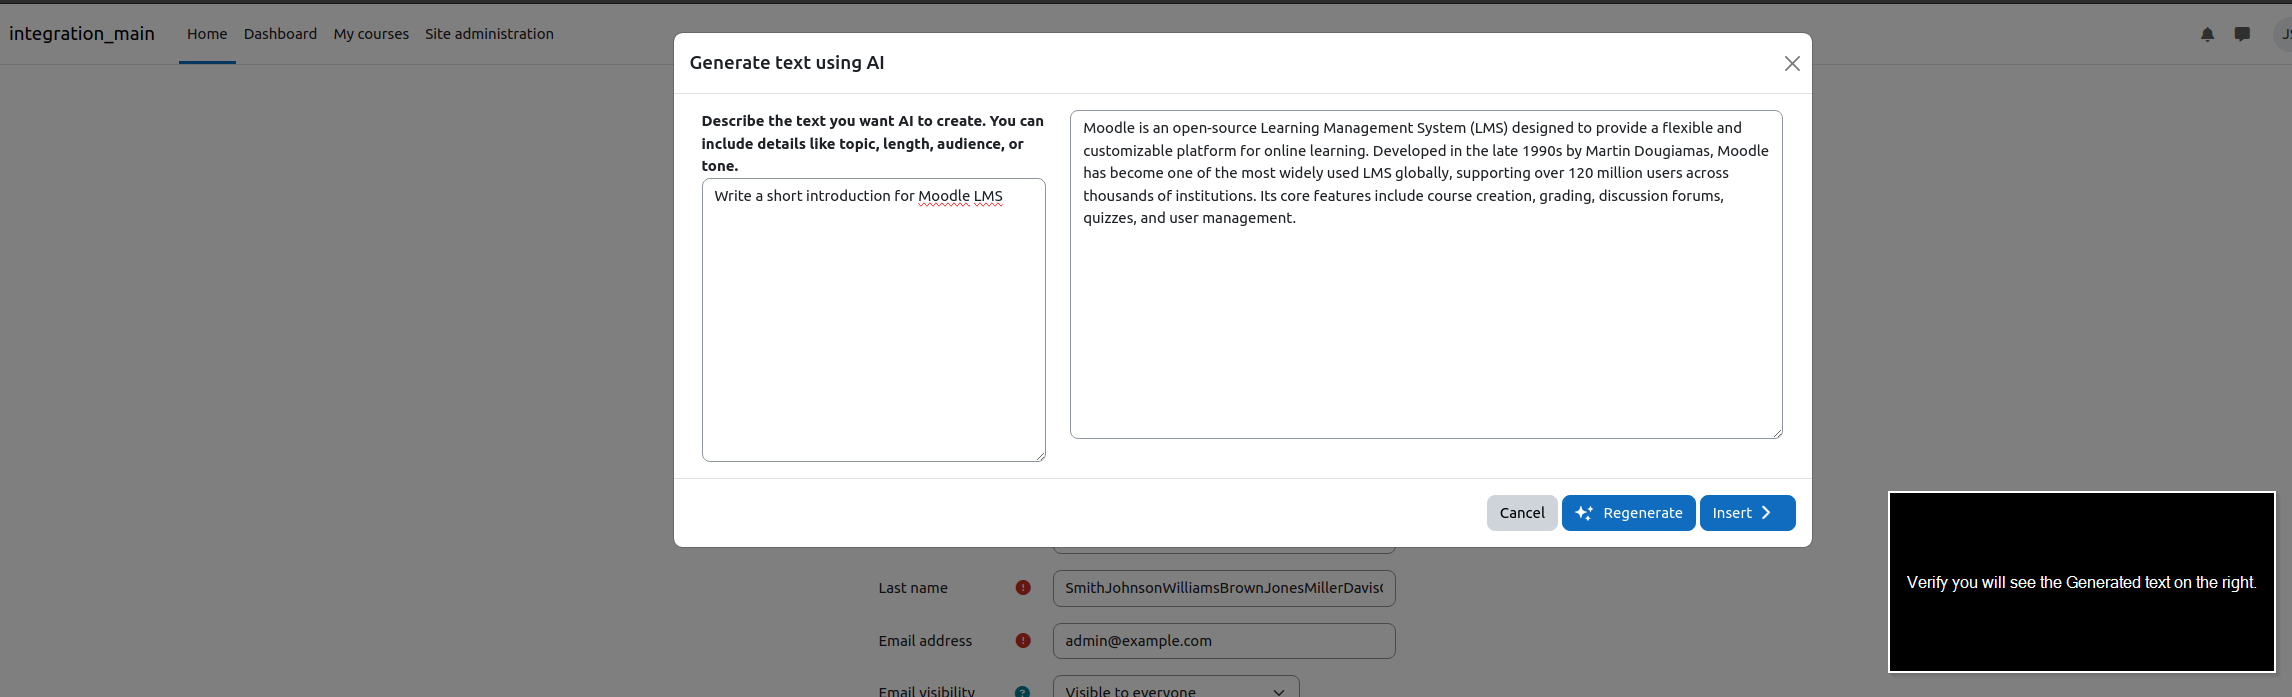
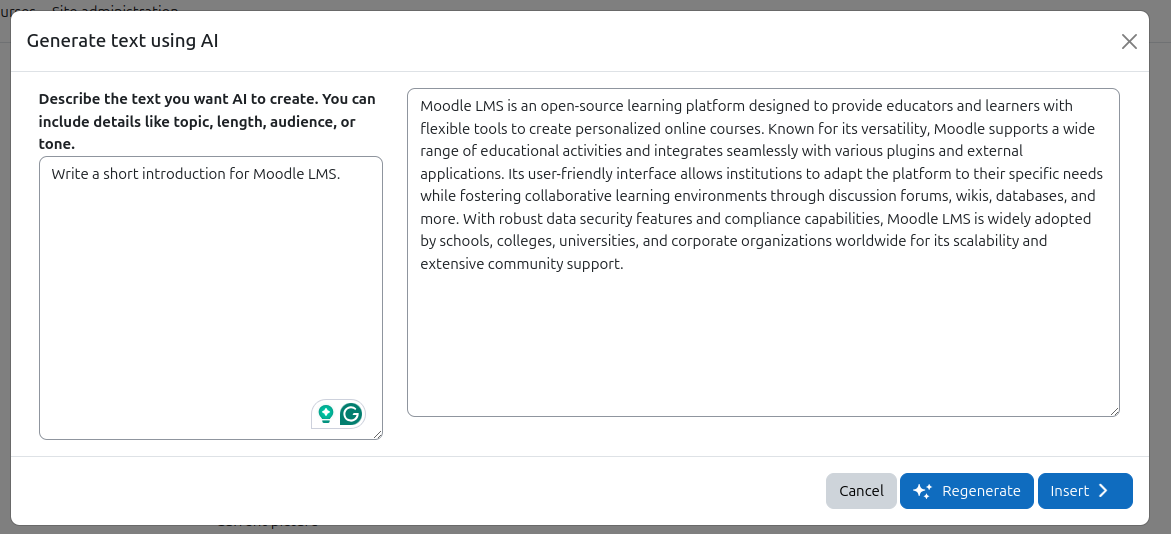
- Input some text in the Describe the text you want AI to create. Example: Write a short introduction for Moodle LMS.
- Press Generate Text.
- Verify you will see the Generated text on the right.
Testing scenario 2: Summarise action
- Go to AI > AI providers and click Setting for Ollama.
- Click on the Settings link for action Summarise text.
- Use the Custom model.
- Enter llama3.2 to Custom model name.
- Save changes.
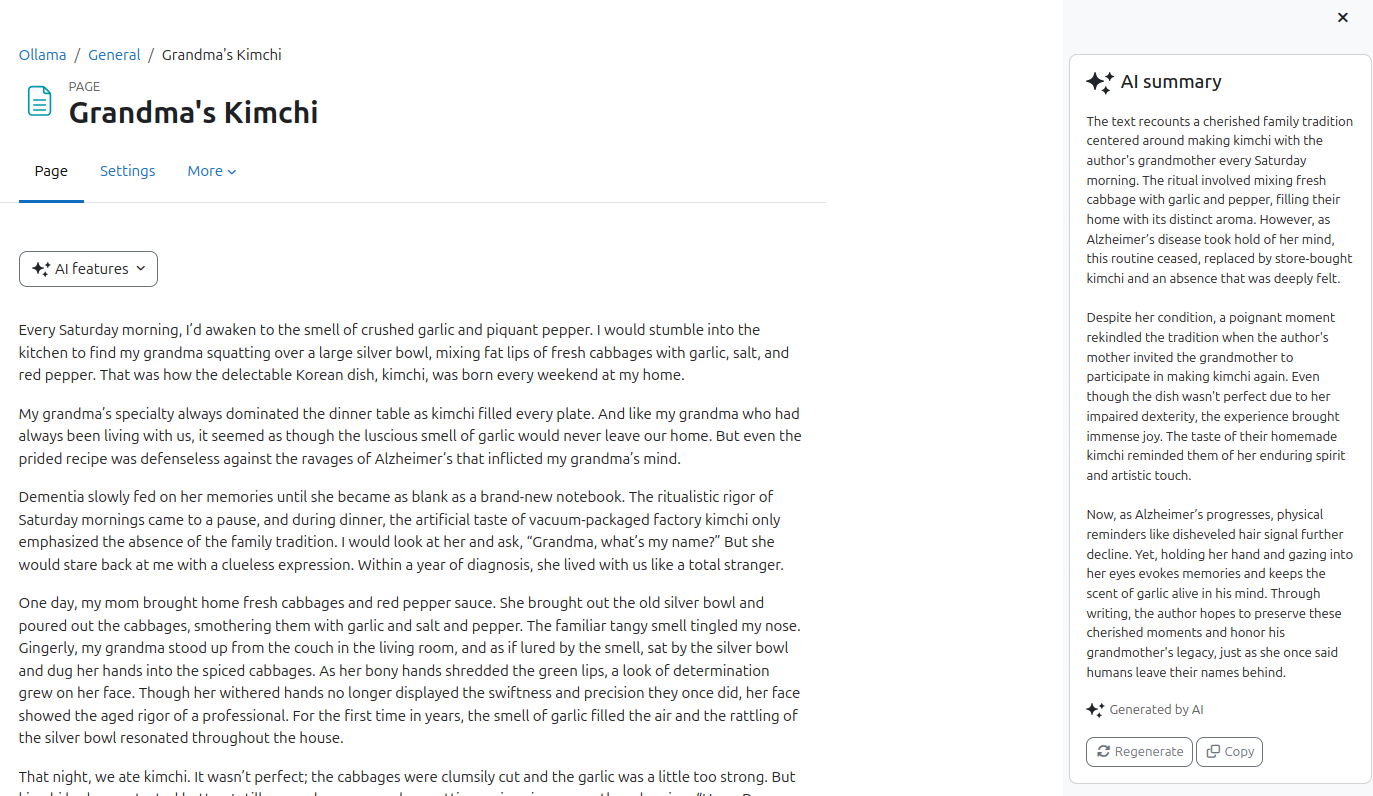
- Navigate to the test course.
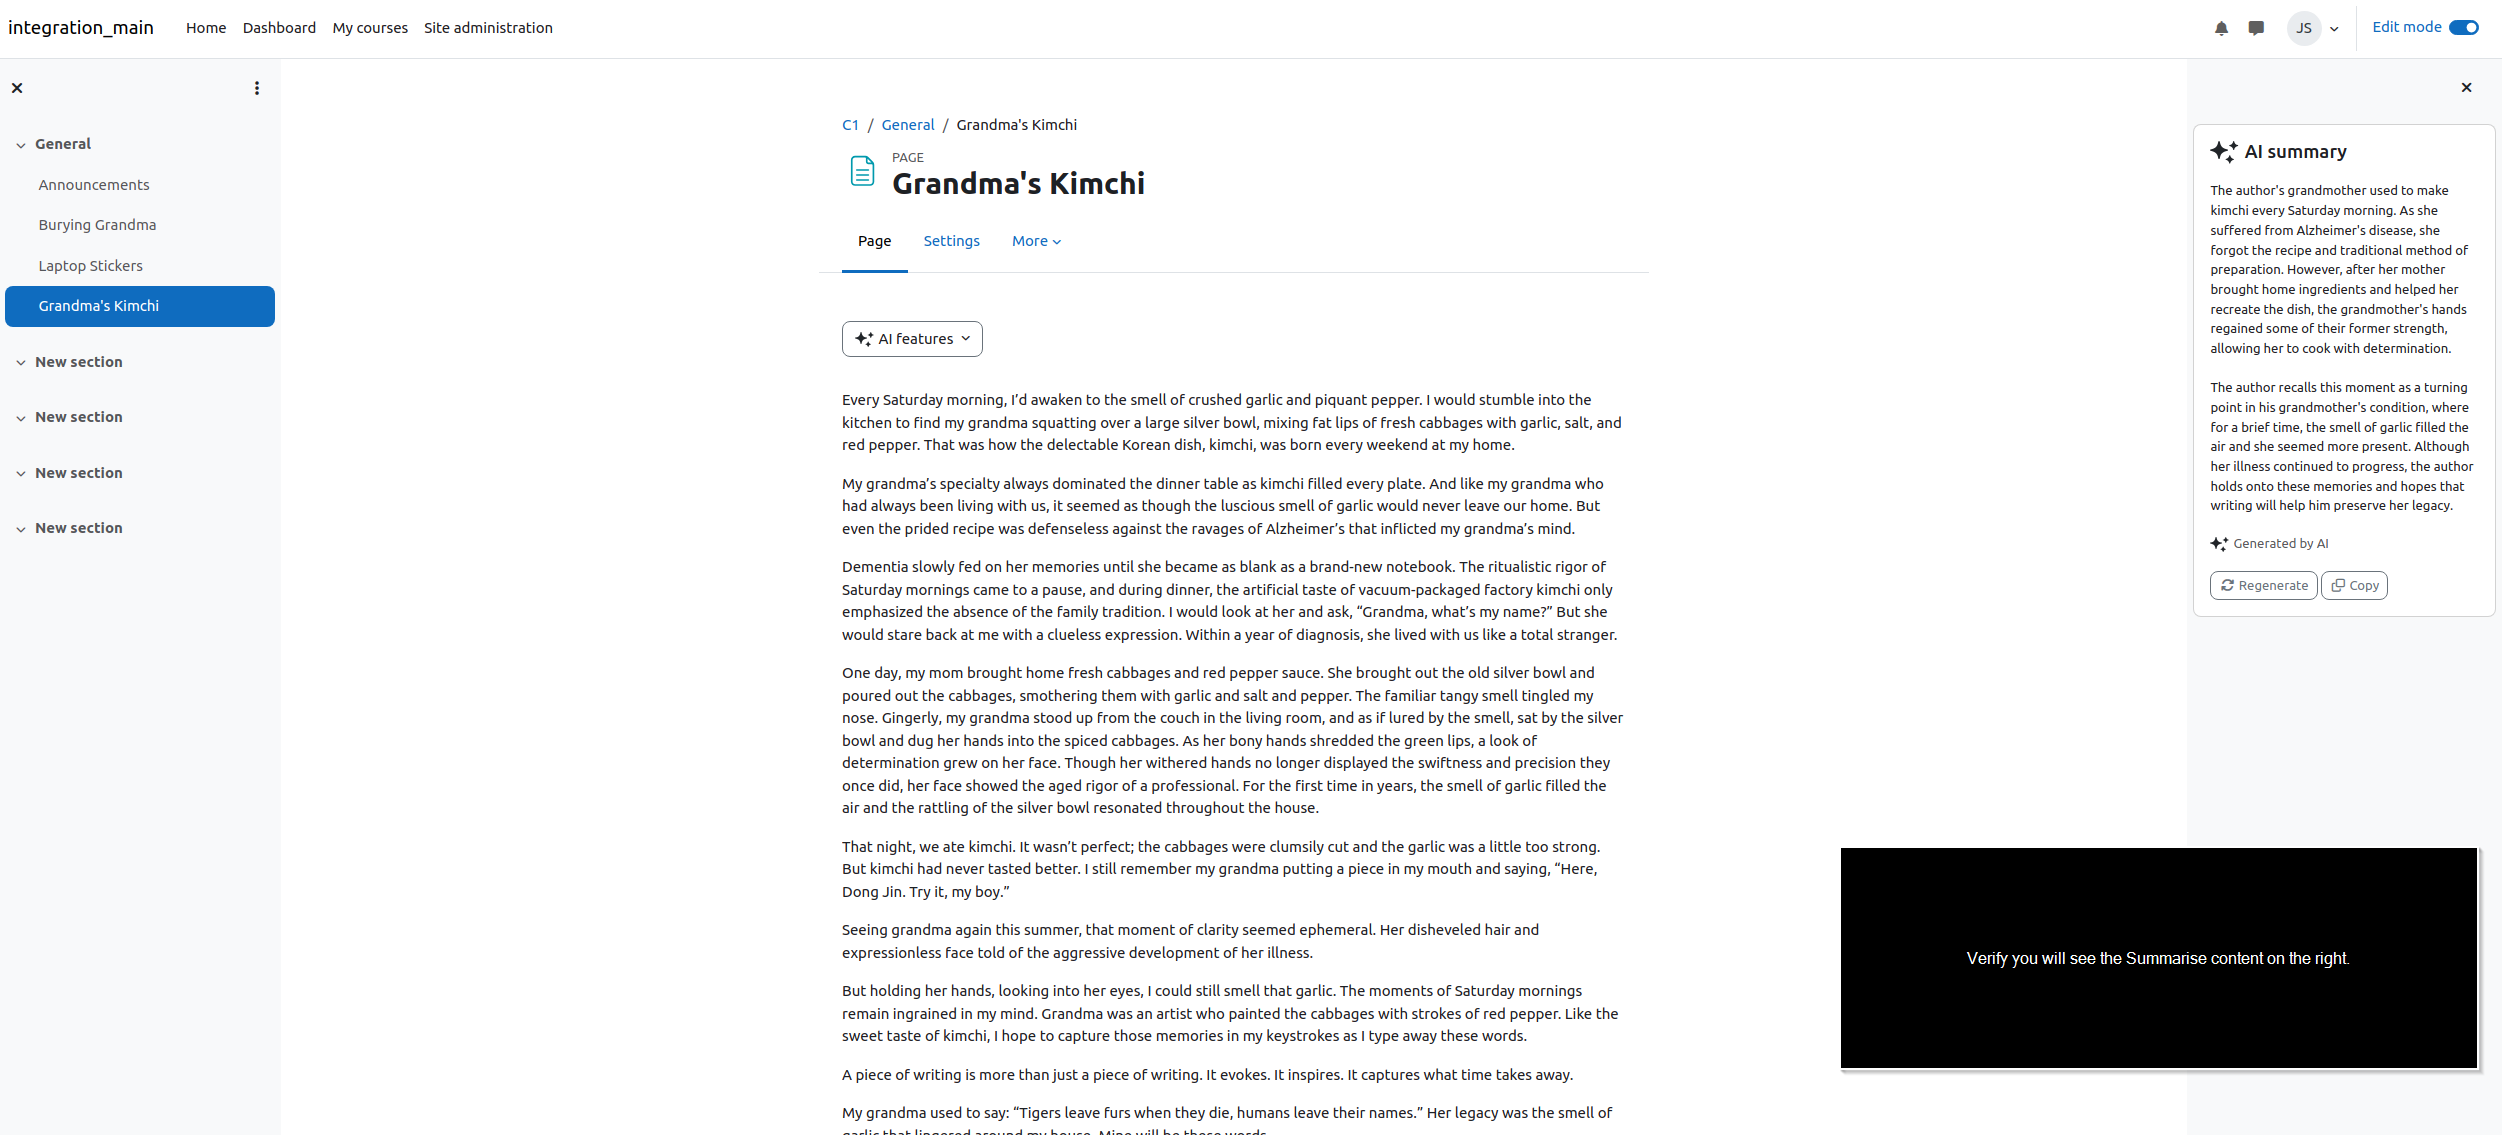
- Navigate to Grandma's Kimchi activity.
- Click on the AI features dropdown list and choose Summarise.
- Agree with the Policy (If any).
- Verify you will see the Summarise content on the right.
Testing scenario 3: Explain action
- Go to AI > AI providers and click Setting for Ollama.
- Click on the Settings link for action Explain text.
- Use the Custom model.
- Enter llama3.2 to Custom model name.
- Save changes.
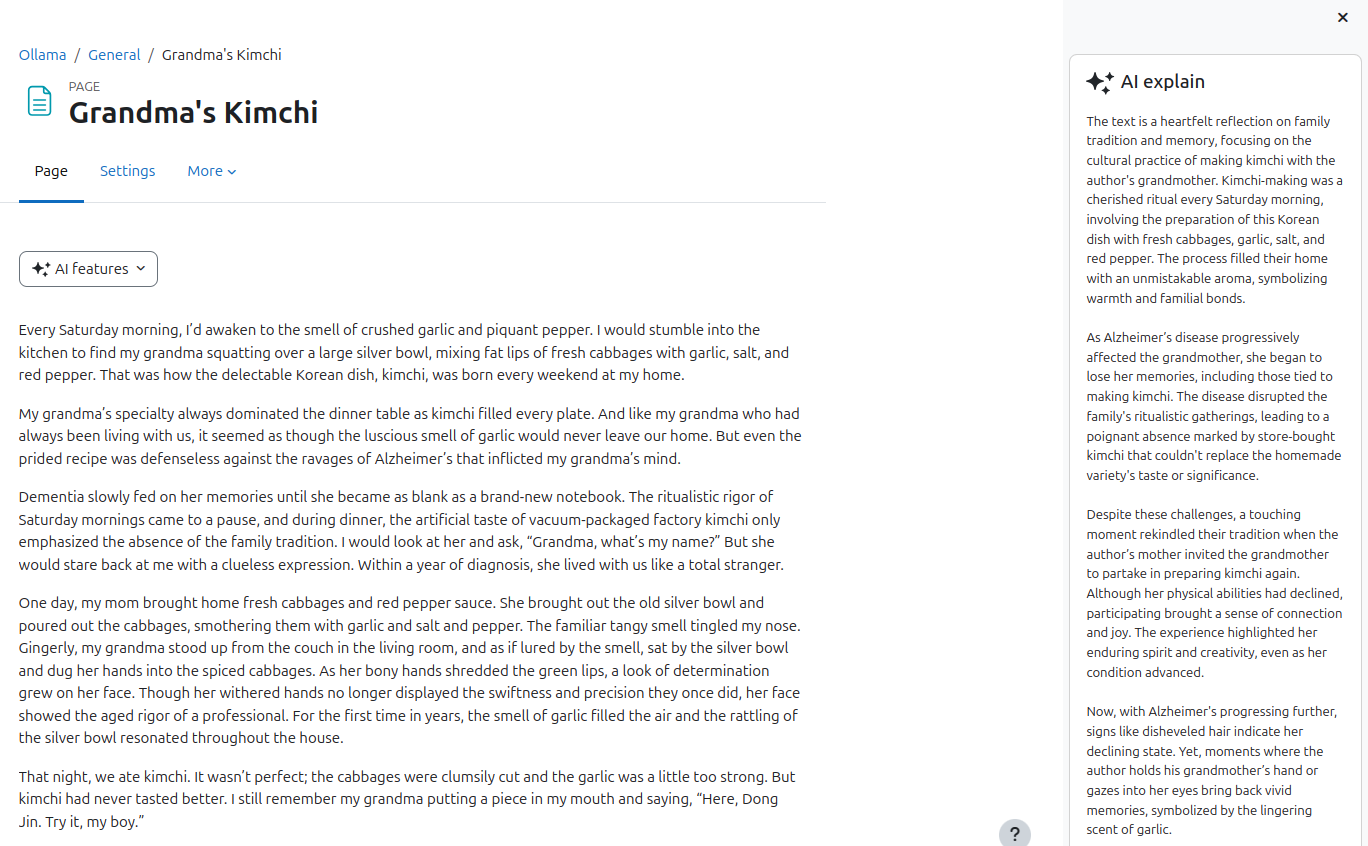
- Navigate to the test course.
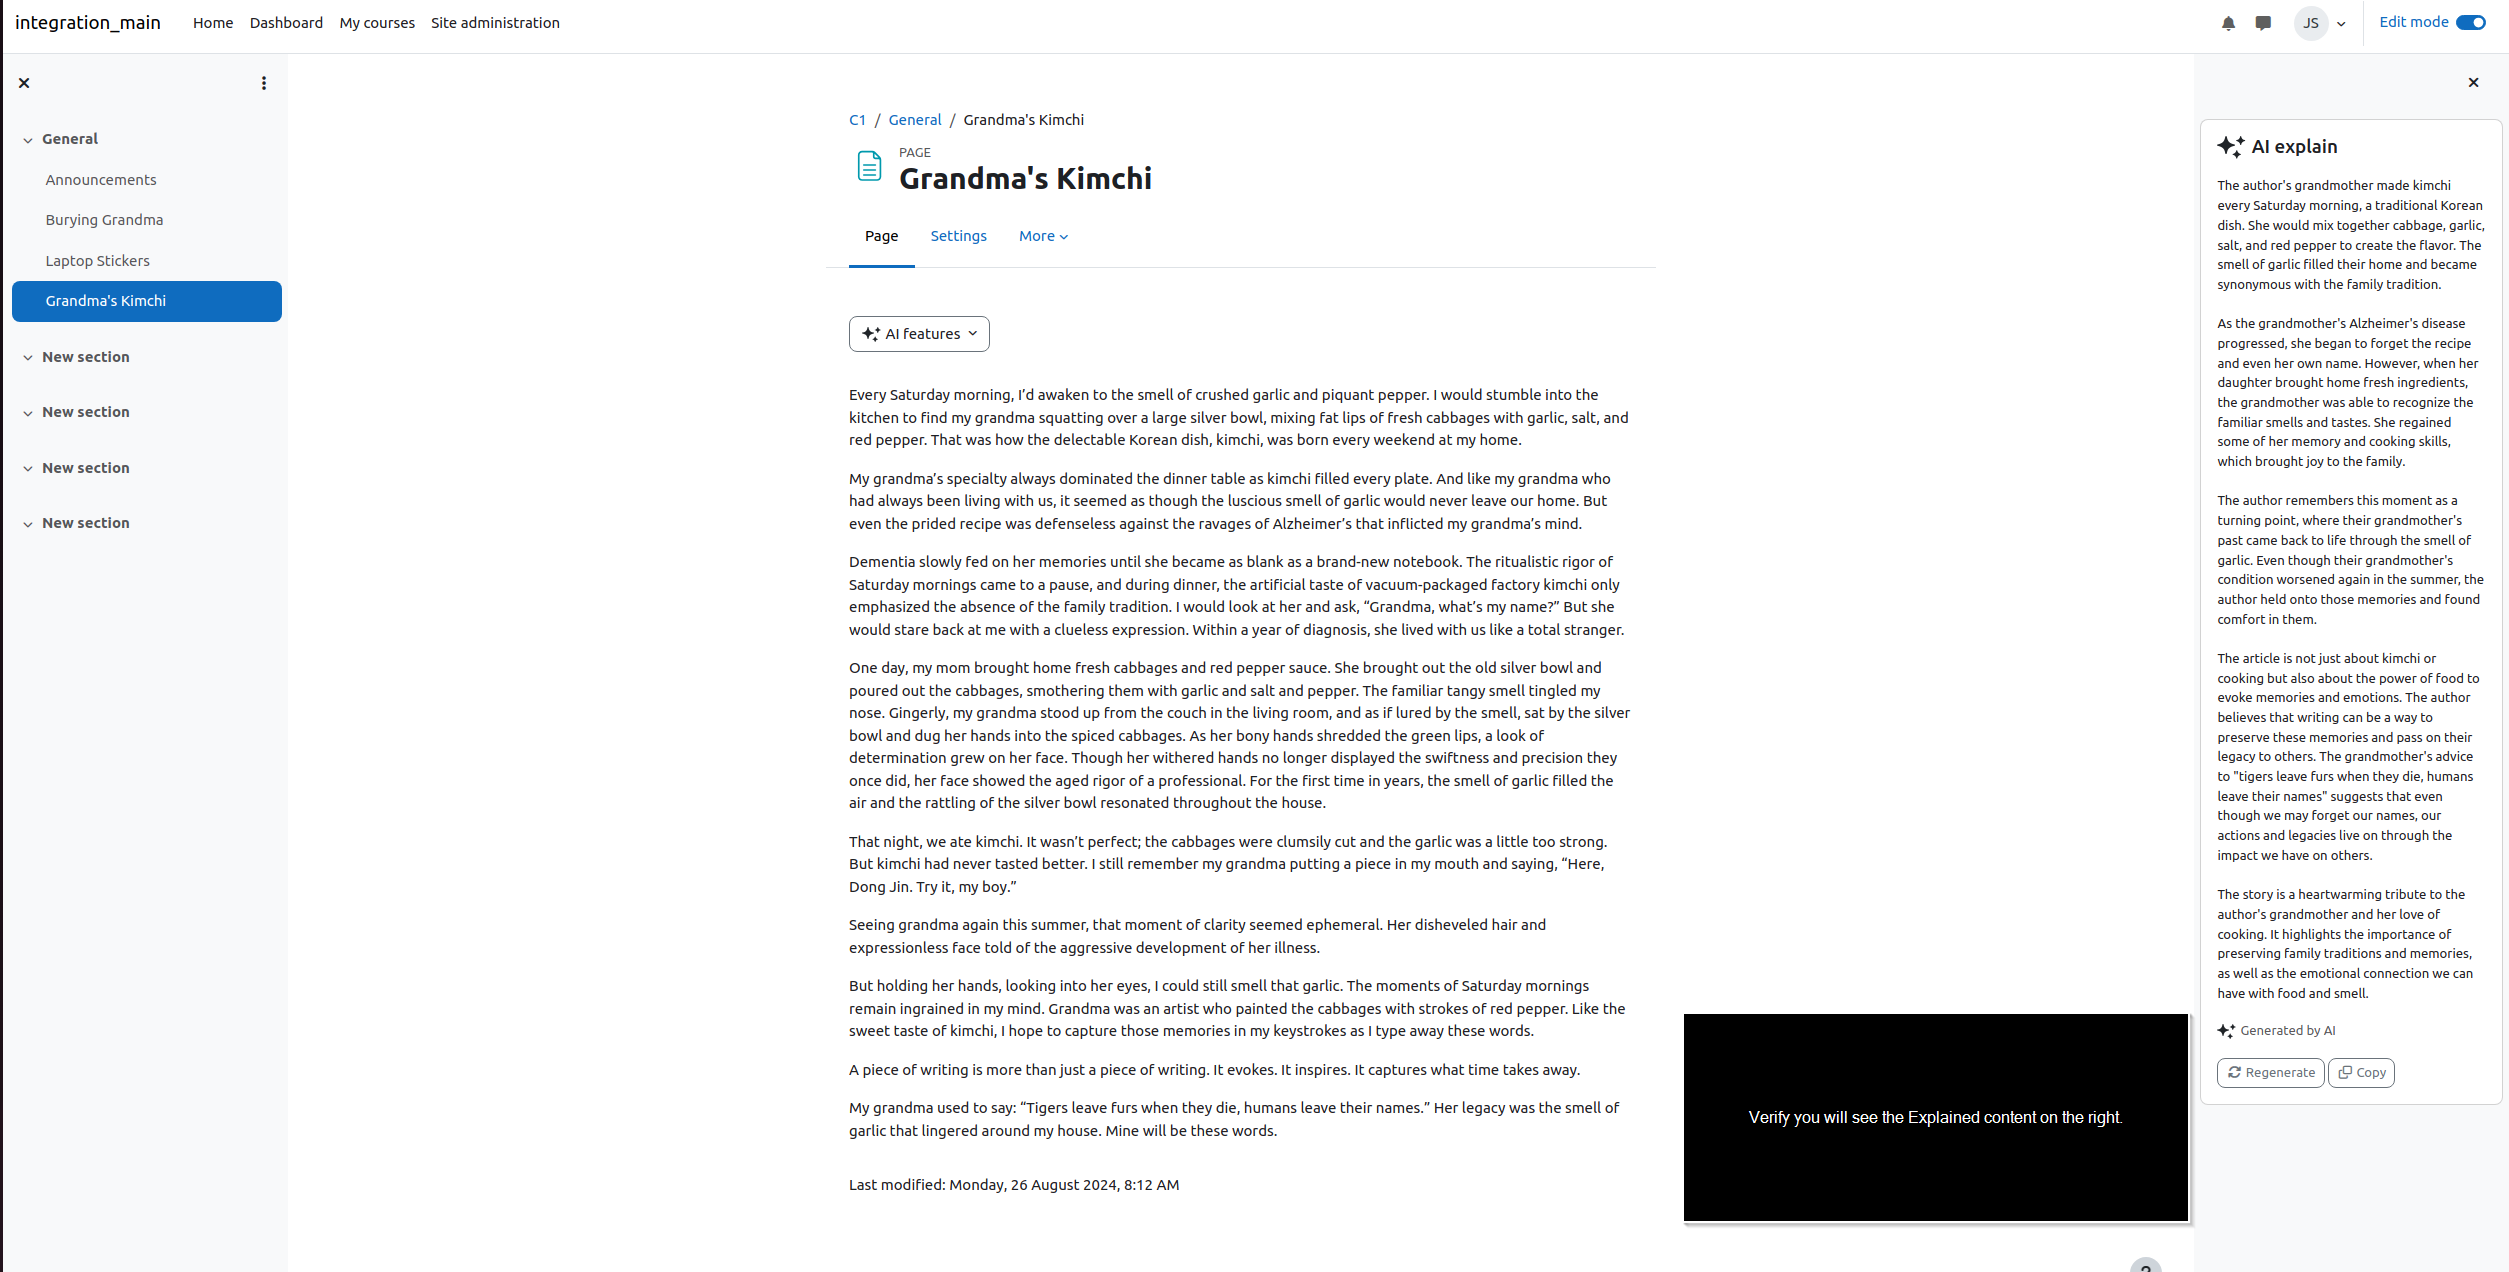
- Navigate to Grandma's Kimchi activity.
- Click on the AI features dropdown list and choose Explain.
- Agree with the Policy (If any).
- Verify you will see the Explained content on the right.
Repeat all the tests (1, 2 and 3) with phi4 model instead of llama3.2
Initial setup Login as admin. Restore the attach course backup-moodle2-course-2-c1-20240826-0815-nu.mbz Clear all curlsecurityblockedhosts and curlsecurityallowedport settings. Setup local Ollama instance: https://github.com/ollama/ollama . For instance, if you want to run your local Ollama instance using docker: docker run -d -v ollama:/root/.ollama -p 11434:11434 --name ollama ollama/ollama Pull llama3.2 and phi4 model. If you run your local Ollama instance with docker: docker exec -it ollama ollama run llama3.2 docker exec -it ollama ollama run phi4 Login as admin. Go to AI > AI placements and enable Text editor placement. Go to AI > AI providers and disable other providers (OpenAI, Azure...) Enable the Ollama provider. Testing scenario 1: Text generation Go to AI > AI providers and click Setting for Ollama. Click on the Settings link for action Generate text . Use the Custom model. Enter llama3.2 to Custom model name. Save changes. Edit your profile. Click on the AI button in the TinyMCE text editor. Select AI Generate Text. Agree with the Policy (If any). Input some text in the Describe the text you want AI to create. Example: Write a short introduction for Moodle LMS. Press Generate Text. Verify you will see the Generated text on the right. Testing scenario 2: Summarise action Go to AI > AI providers and click Setting for Ollama. Click on the Settings link for action Summarise text . Use the Custom model. Enter llama3.2 to Custom model name. Save changes. Navigate to the test course. Navigate to Grandma's Kimchi activity. Click on the AI features dropdown list and choose Summarise. Agree with the Policy (If any). Verify you will see the Summarise content on the right. Testing scenario 3: Explain action Go to AI > AI providers and click Setting for Ollama. Click on the Settings link for action Explain text . Use the Custom model. Enter llama3.2 to Custom model name. Save changes. Navigate to the test course. Navigate to Grandma's Kimchi activity. Click on the AI features dropdown list and choose Explain. Agree with the Policy (If any). Verify you will see the Explained content on the right. Repeat all the tests (1, 2 and 3) with phi4 model instead of llama3.2 -
 Fails against automated checks.
Checked
MDL-83006using repository: https://github.com/HuongNV13/moodle.git main (3 errors / 0 warnings) [branch: MDL-83006-main | CI Job]
Built on: Mon Mar 24 15:50:00 UTC 2025
Fails against automated checks. Checked MDL-83006 using repository: https://github.com/HuongNV13/moodle.git main (3 errors / 0 warnings) [branch: MDL-83006-main | CI Job ] overview (0/0) , phplint (0/0) , phpcs (3/0) , js (0/0) , css (0/0) , phpdoc (0/0) , commit (0/0) , savepoint (0/0) , thirdparty (0/0) , externalbackup (0/0) , grunt (0/0) , shifter (0/0) , mustache (0/0) , gherkin (0/0) , Should these errors be fixed? Built on: Mon Mar 24 15:50:00 UTC 2025 -
-
6
-
Team Hedgehog 2024 Sprint 4.3, Team Hedgehog 2025 Sprint 1.0, Team Hedgehogs 2025 Sprint 1.1, Team Hedgehogs 2025 Sprint 1.2, Team Hedgehogs 2025 Sprint 1.3
Create an AI provider plugin that interfaces with Ollama: https://ollama.com/
Ollama is an open-source project that serves as a powerful and user-friendly platform for running LLMs on your local machine. It acts as a bridge between the complexities of LLM technology and the desire for an accessible and customizable AI experience.
This plugin will interface with the upstream AI service and will make available AI Actions to the subsystem.
Initial Supported Actions:
- Generate: Generate text content based on user prompt text
- Summarise: Summarise the provided text. Condense long text into key points. Simplify anything too complex for learners to understand.
Useful related links:
- https://github.com/ollama/ollama?tab=readme-ov-file
- https://github.com/ollama/ollama/blob/main/docs/api.md
- https://chariotsolutions.com/blog/post/apple-silicon-gpus-docker-and-ollama-pick-two/
Basic Authentication
By default Ollama does not support any authentication to secure access to the Ollama instance. The "recommended" way from the Ollama documentation and github is to use a reverse proxy like Cady or Nginx and use Basic Authentication.
Ollama Test Environments
Local
Ollama can be run locally for testing of Models, or on the same server. This approach is supported by the plugin.
AWS
For testing larger models or for anyone that doesn't have enough resources locally to run LLMs via Ollama. A test instance can be setup in AWS.
The repository and instructions on running this can be found: https://github.com/mattporritt/aws_ollama
This will set up an EC2 instance in AWS running Ollama that can be accessed publicly. This test instance also sends traffic via HTTPS for more secure data transfer and implements Basic Auth.
The EC2 instance size and storage etc can be customised.
NOTE: Running an Instance in AWS will cost money.
- caused a regression
-
MDL-85027 AI: Revert AI lang string changes and fix Ollama's endpoint
-

- Closed
-
- has a non-specific relationship to
-
MDLSITE-8082 Update Moodle docs for AI providers added in 5.0
-

- Resolved
-
- is blocked by
-
-
- Closed
-
-
-

- Closed
-
-
MDL-82609 AI: Provider - Action settings
-
- Closed
-
-
-
- Closed
-
- links to
