-
Improvement
-
Resolution: Fixed
-
 Minor
Minor
-
4.2
-
MOODLE_402_STABLE
-
MOODLE_404_STABLE
-
MDL-78096-main-alt -
To ensure seamless testing, I am providing a sample image and PDF file to be used during the testing process.
Image: sample.png

PDF: sample.pdf
Testing 1: Repositories
Here are the steps to follow for the TinyMCE Image works with repositories:
- Log in to your account as the admin user.
- Navigate to the Site Admin > Plugins > Repositories > Manage repositories.
- Set the "Enable and visible" value to the Upload a file and Wikimedia repository and let the rest disabled.
- Navigate to the Edit Profile page.
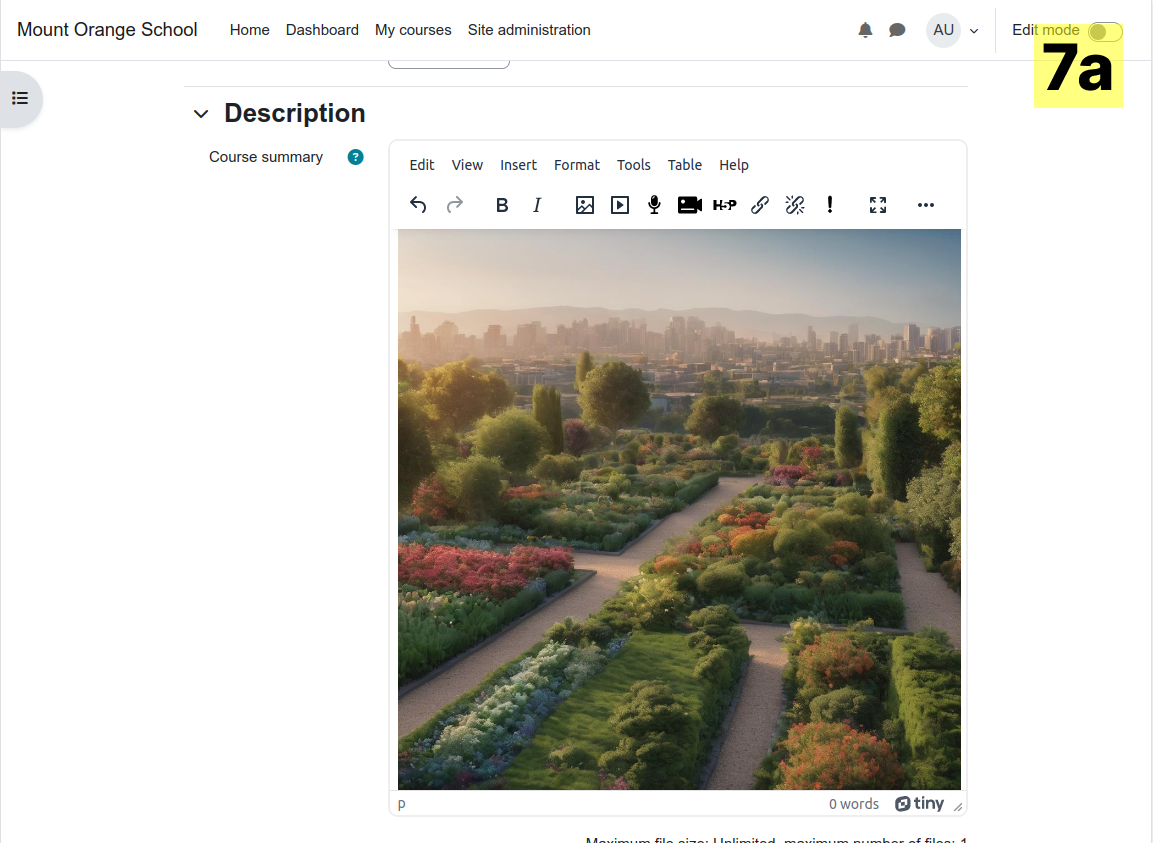
- In the description editor toolbar, click the image icon
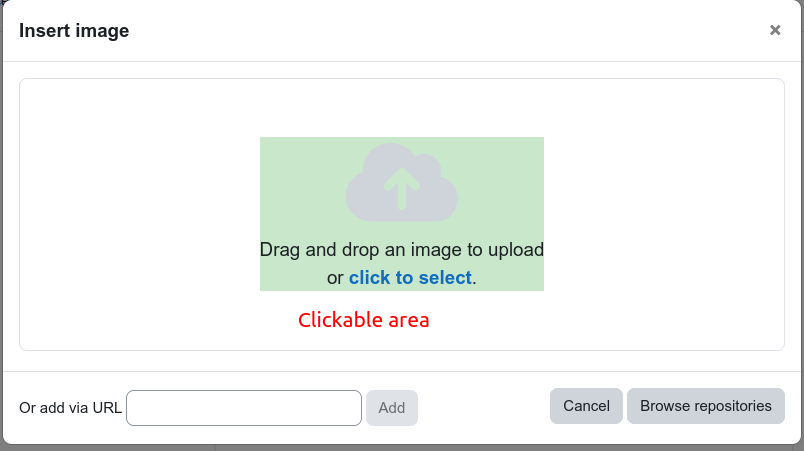
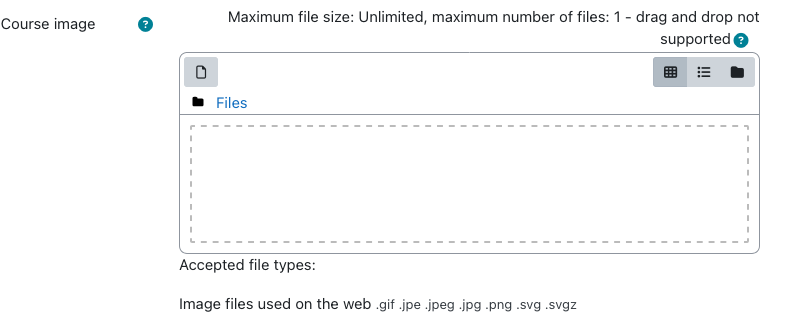
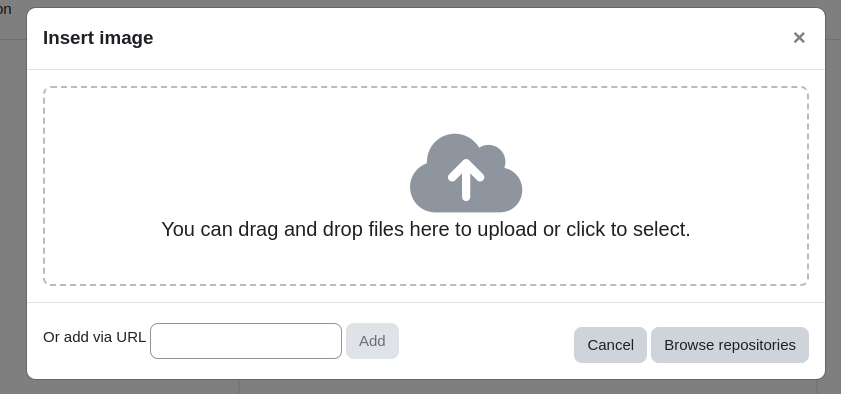
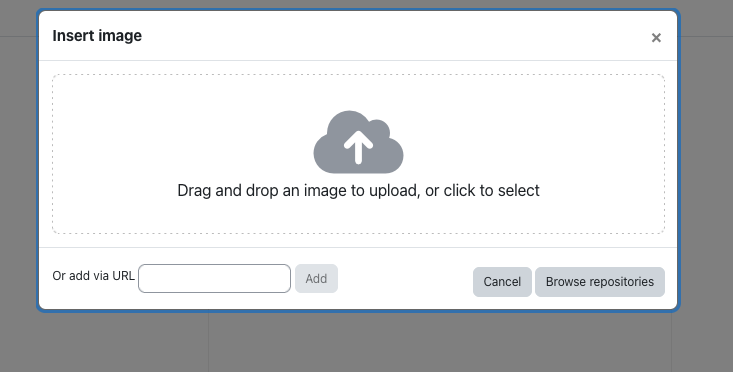
- Verify that there is an icon and text "You can drag and drop files here to upload or click to select." and the browse repositories button
- Navigate back to the Site Admin > Plugins > Repositories > Manage repositories.
- Disable the Upload a file repository
- Navigate back to the Edit Profile page.
- In the description editor toolbar, click the image icon
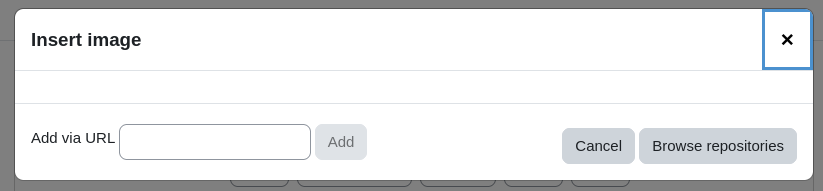
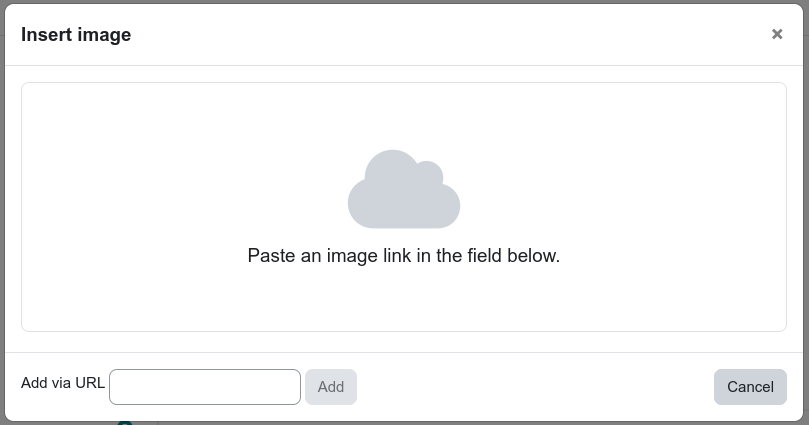
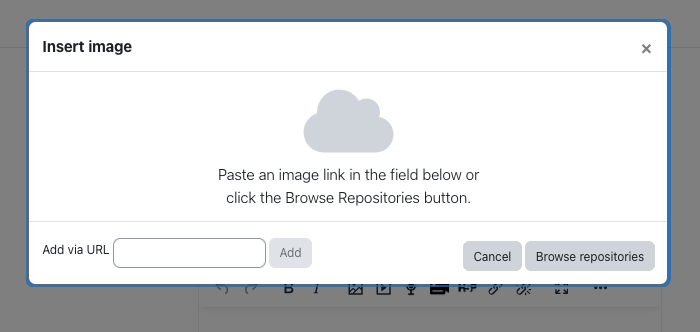
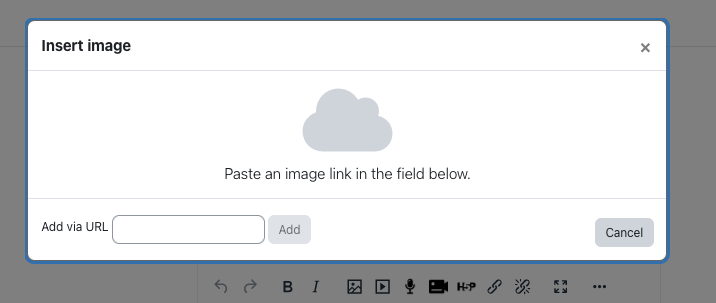
- Verify that there is an icon and text "Paste an image link in the field below or click the Browse Repositories button." and the browse repositories button
- Navigate back to the Site Admin > Plugins > Repositories > Manage repositories.
- Disable the Wikimedia repository
- Navigate back to the Edit Profile page.
- In the description editor toolbar, click the image icon
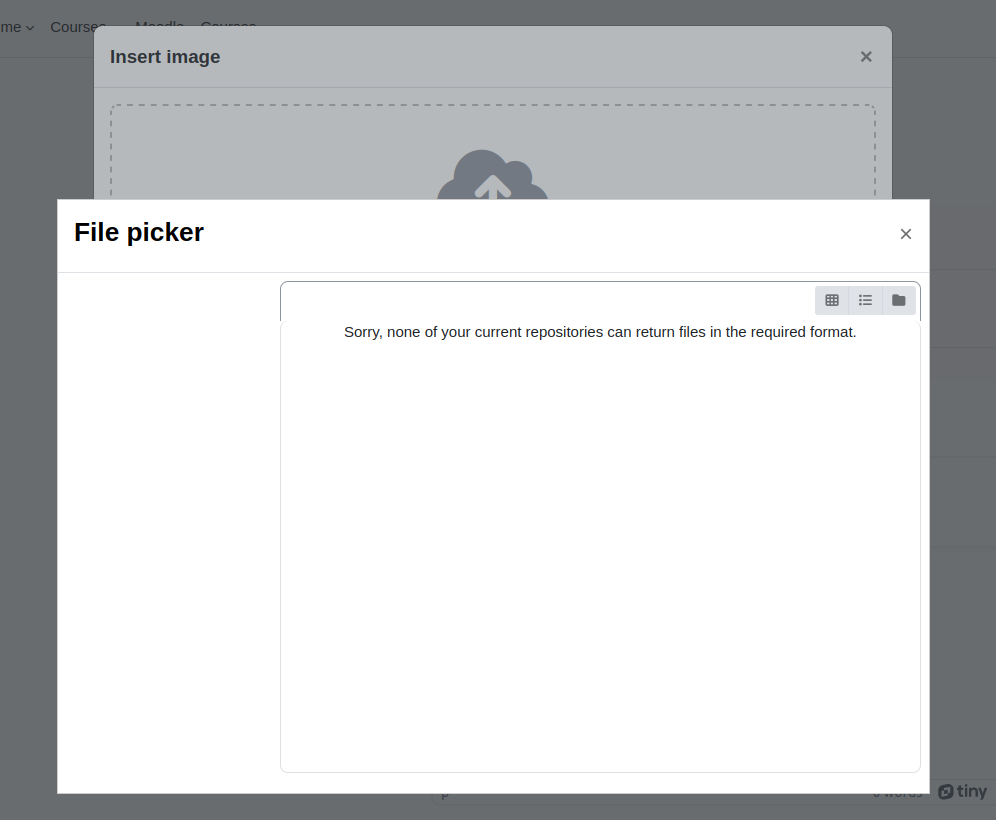
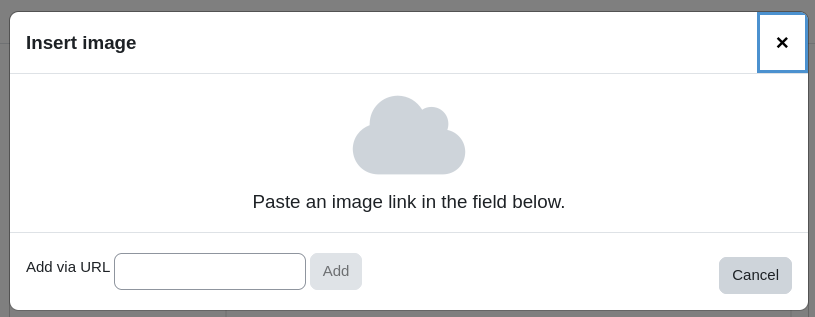
- Verify that there is an icon and text "Paste an image link in the field below." and there is no browse repositories button.
Testing 2: Click anywhere inside the drag-and-dropzone
Here are the steps to follow for uploading an image:
- Log in to your account as the admin user.
- Navigate to the Edit Profile section.
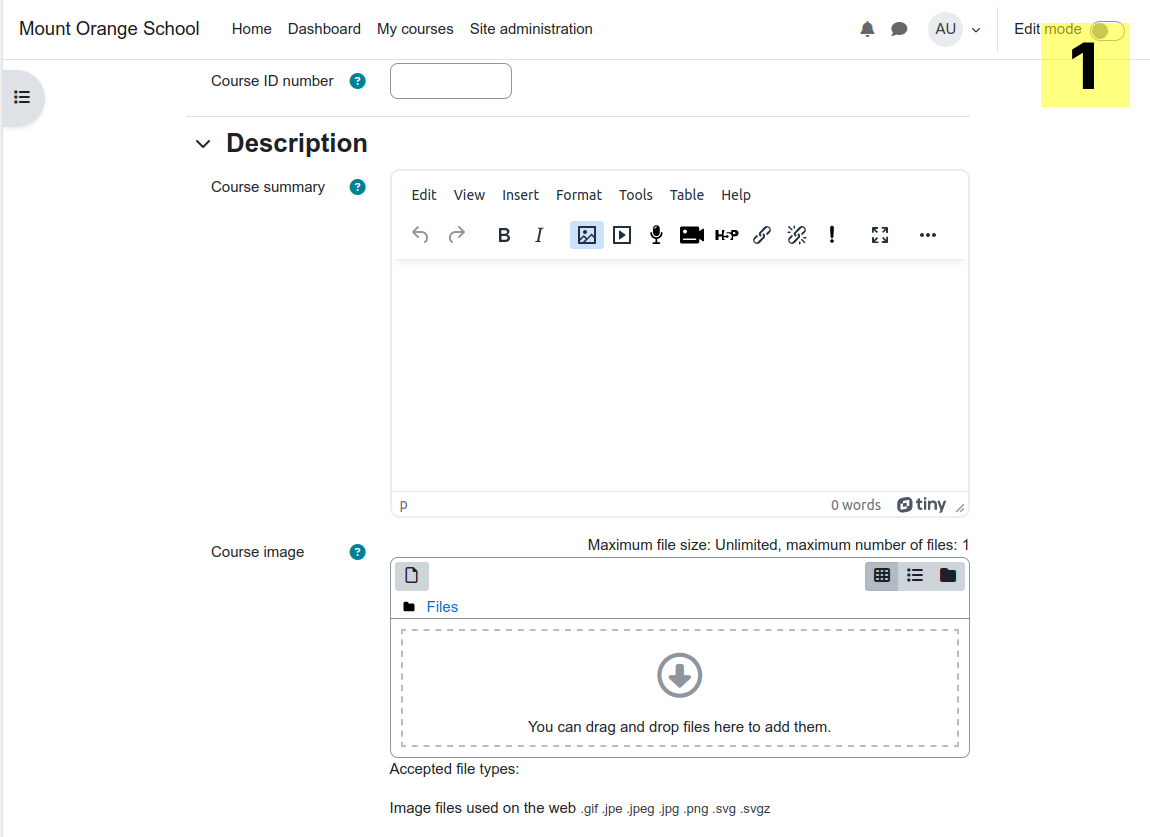
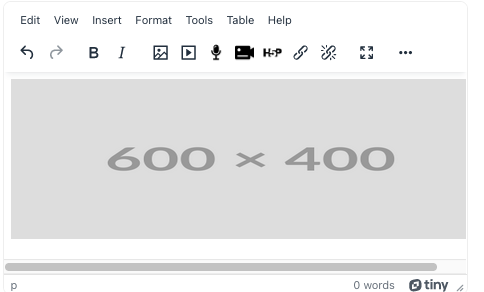
- Click on the "Image" icon in the toolbar located in the description field.
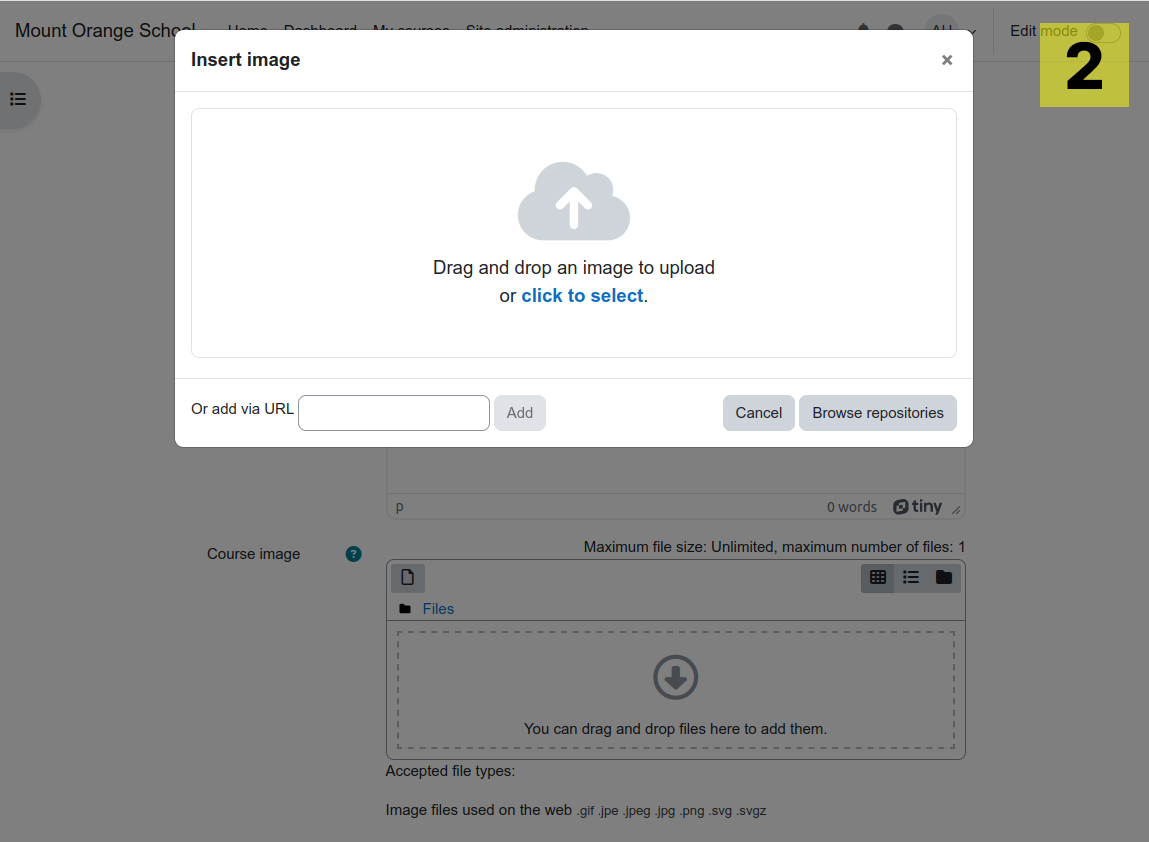
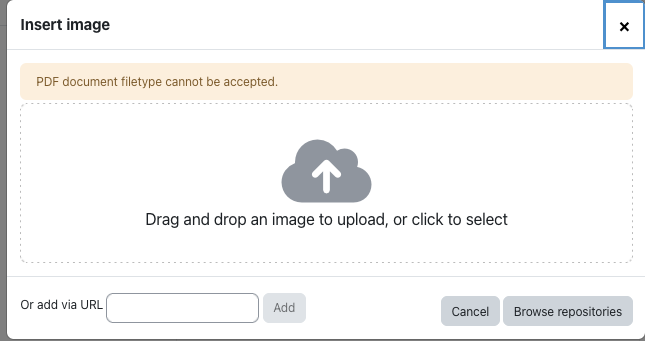
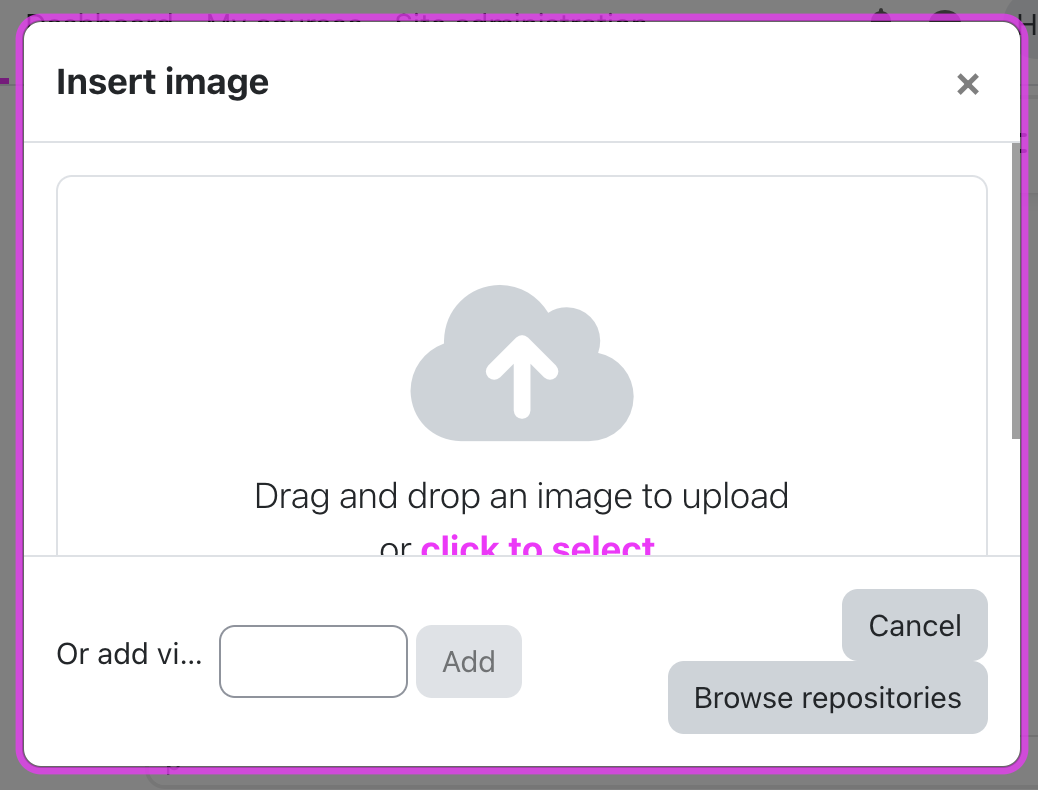
- Verify that a drag-and-drop zone with the following message appears - "Drag and drop an image to upload or click to select".
- Open the Web developer tools and navigate to Network. Select "Regular 3G" from the Throttling dropdown.
- Click anywhere in the drag-and-drop zone.
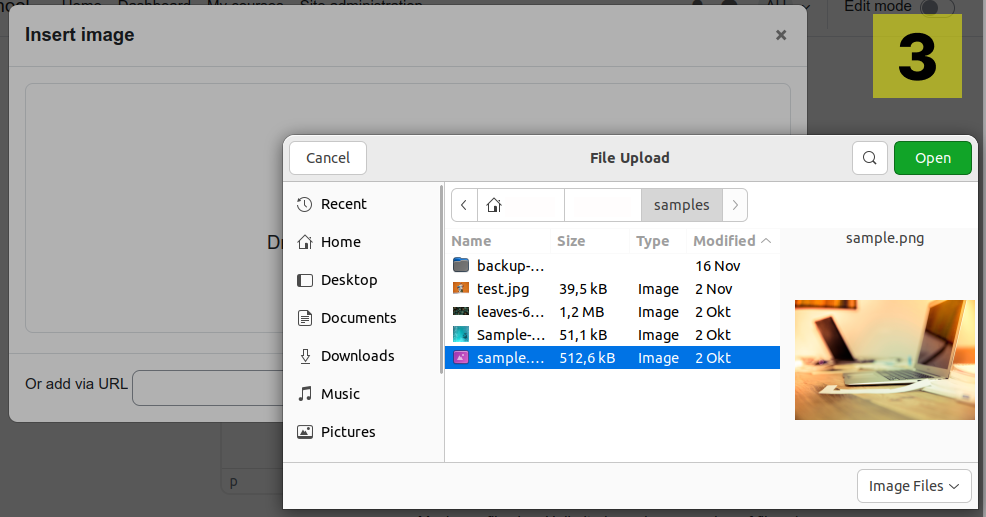
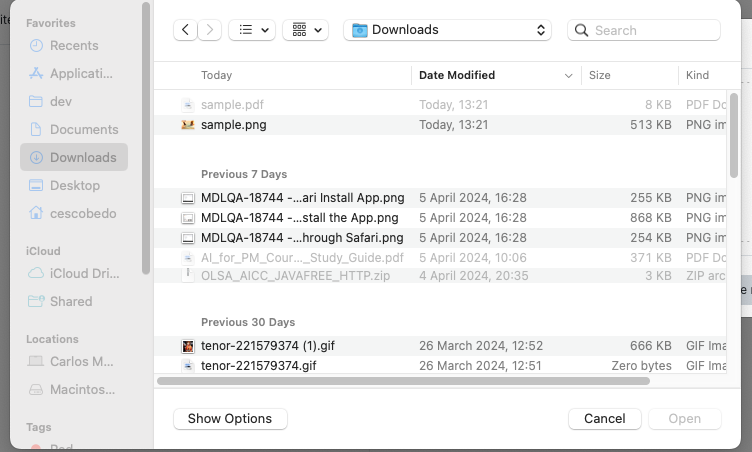
- Verify that you are prompted with the native OS file picker.
- Ensure that you only see files with the image type, such as *.jpg or *.png.
- Select an image.
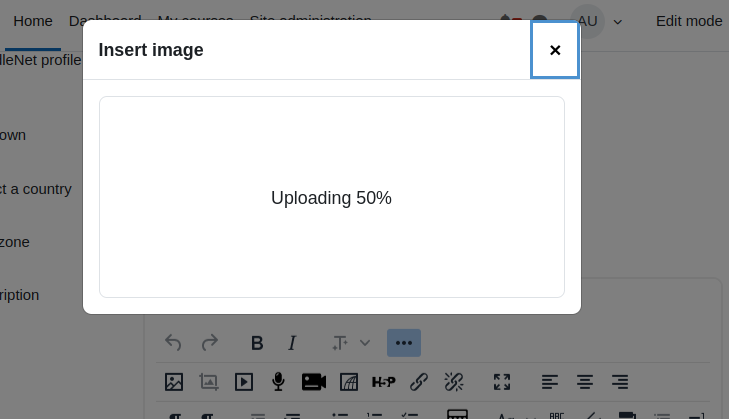
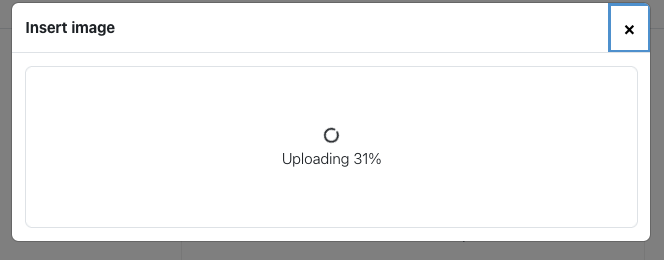
- Verify that you see a preloader icon with uploading progress in percentage.
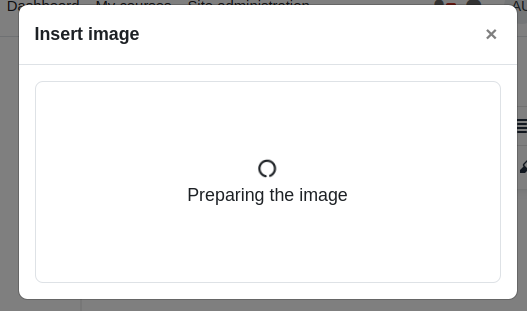
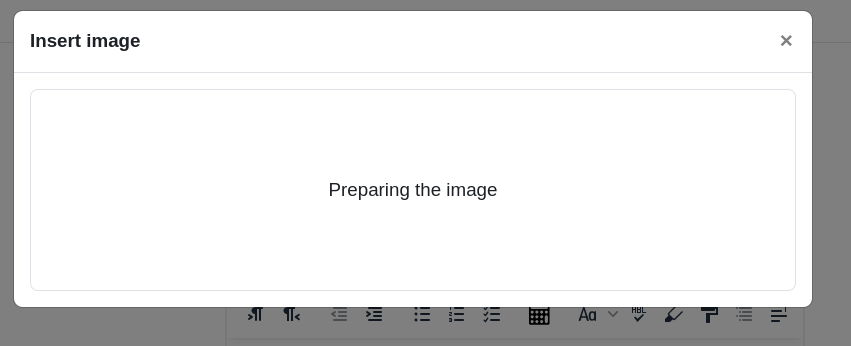
- After the progress hits 100%, verify that you see a loading icon.
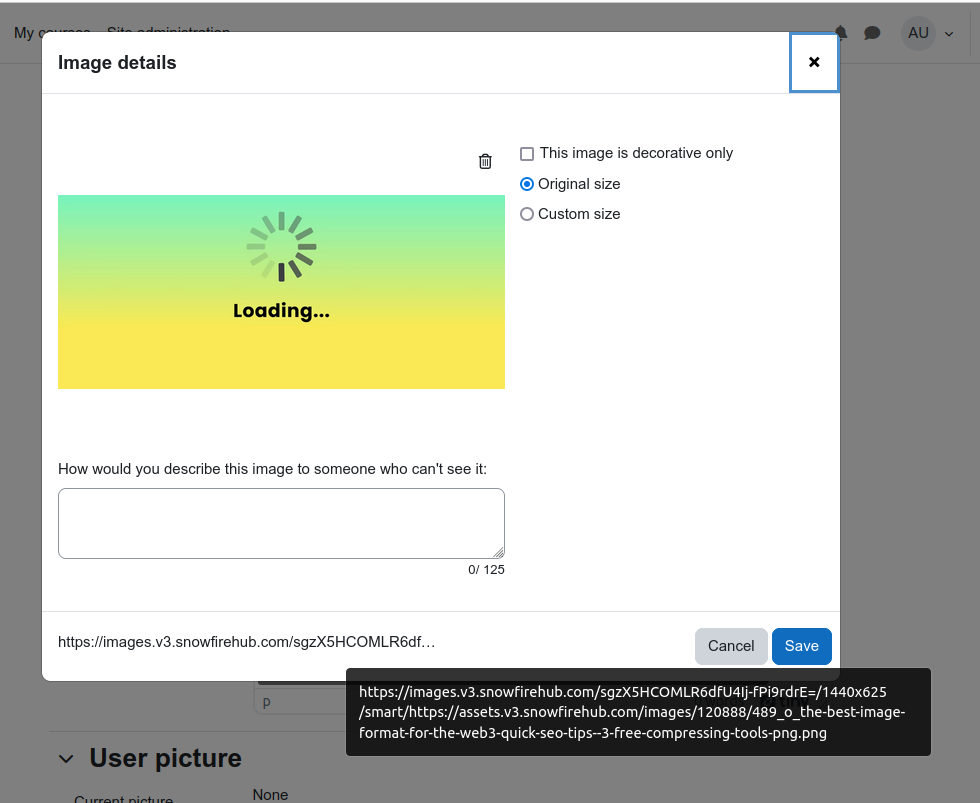
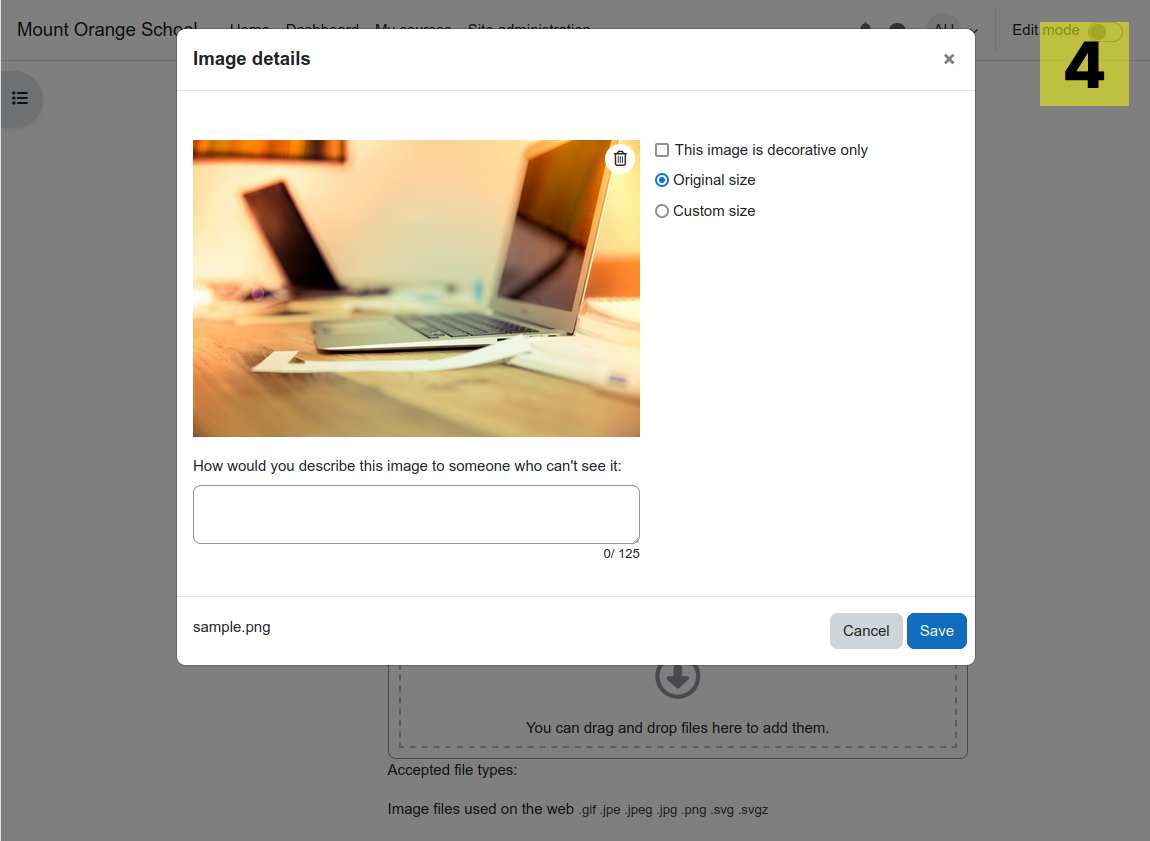
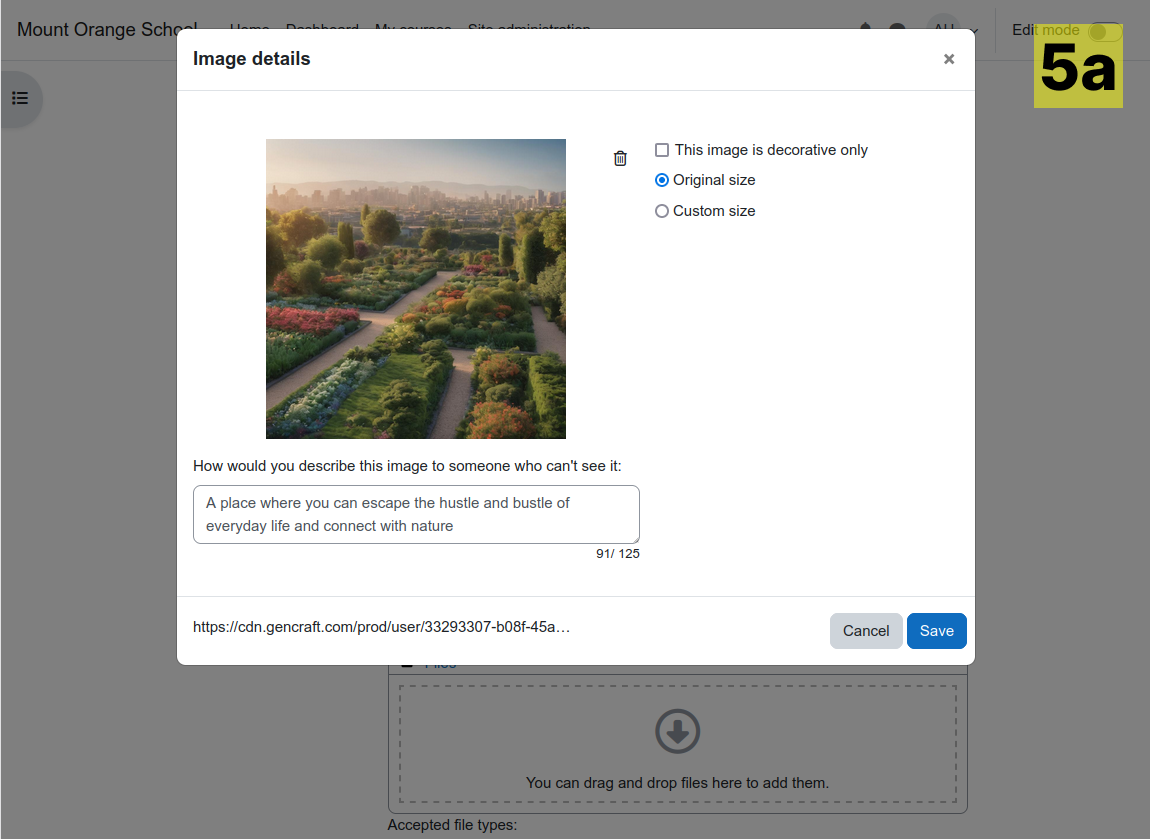
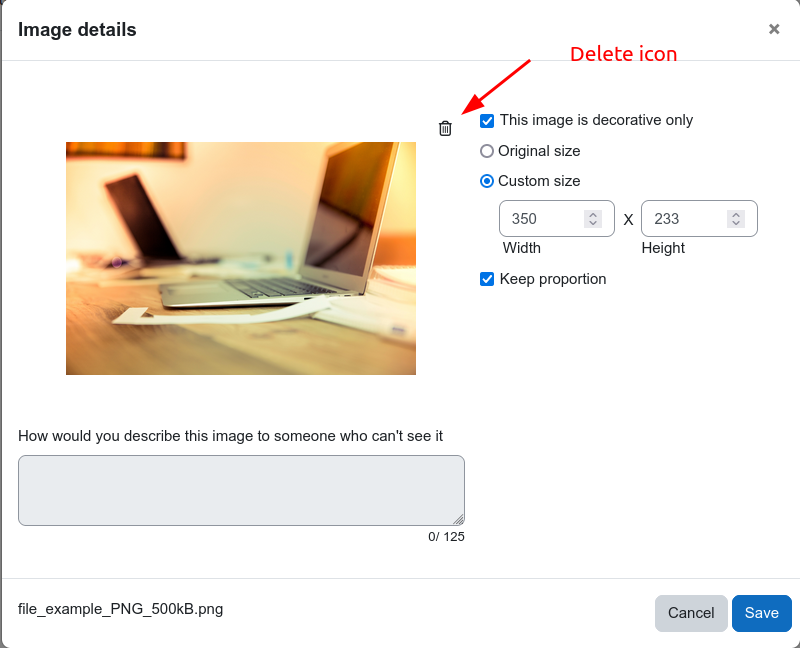
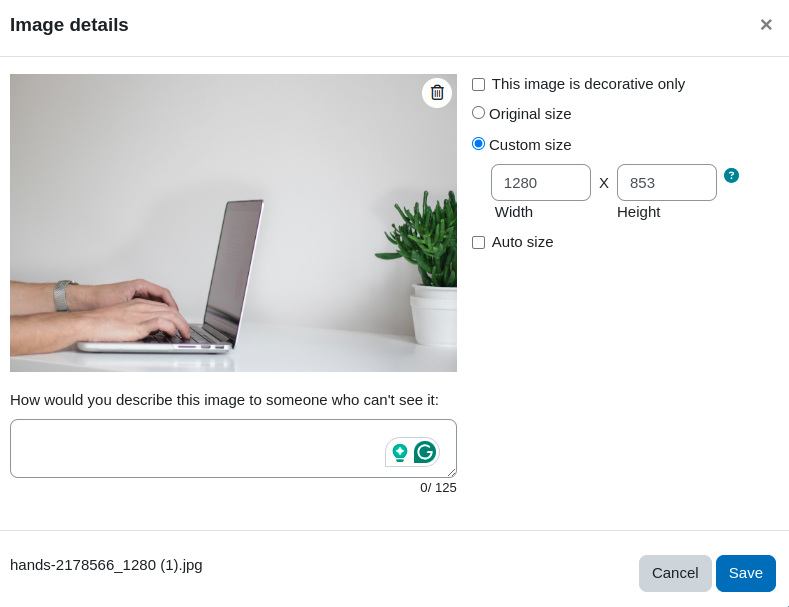
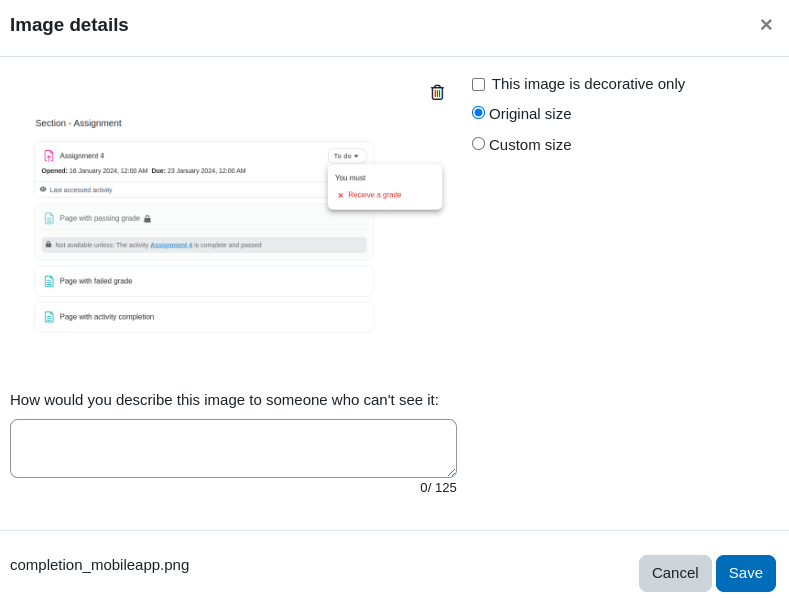
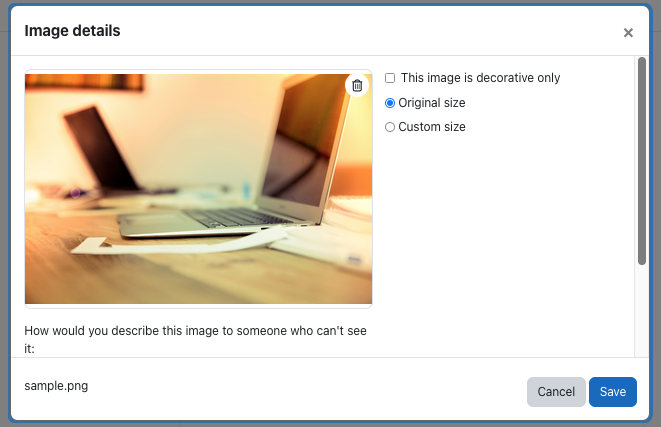
- After the loading is done, verify that you will see the image details.
- Look for a trash icon on the top right of the image preview box and click it.
- Verify that you are returned to the initial view.
Testing 3: Drag and drop from the OS file manager (Continue from Testing 1)
Here are the steps to follow for uploading an image:
- Open your OS file manager, such as Files, Finder or Explorer.
- Click and drag a non-image file, such as a PDF, to the drag-and-drop zone.
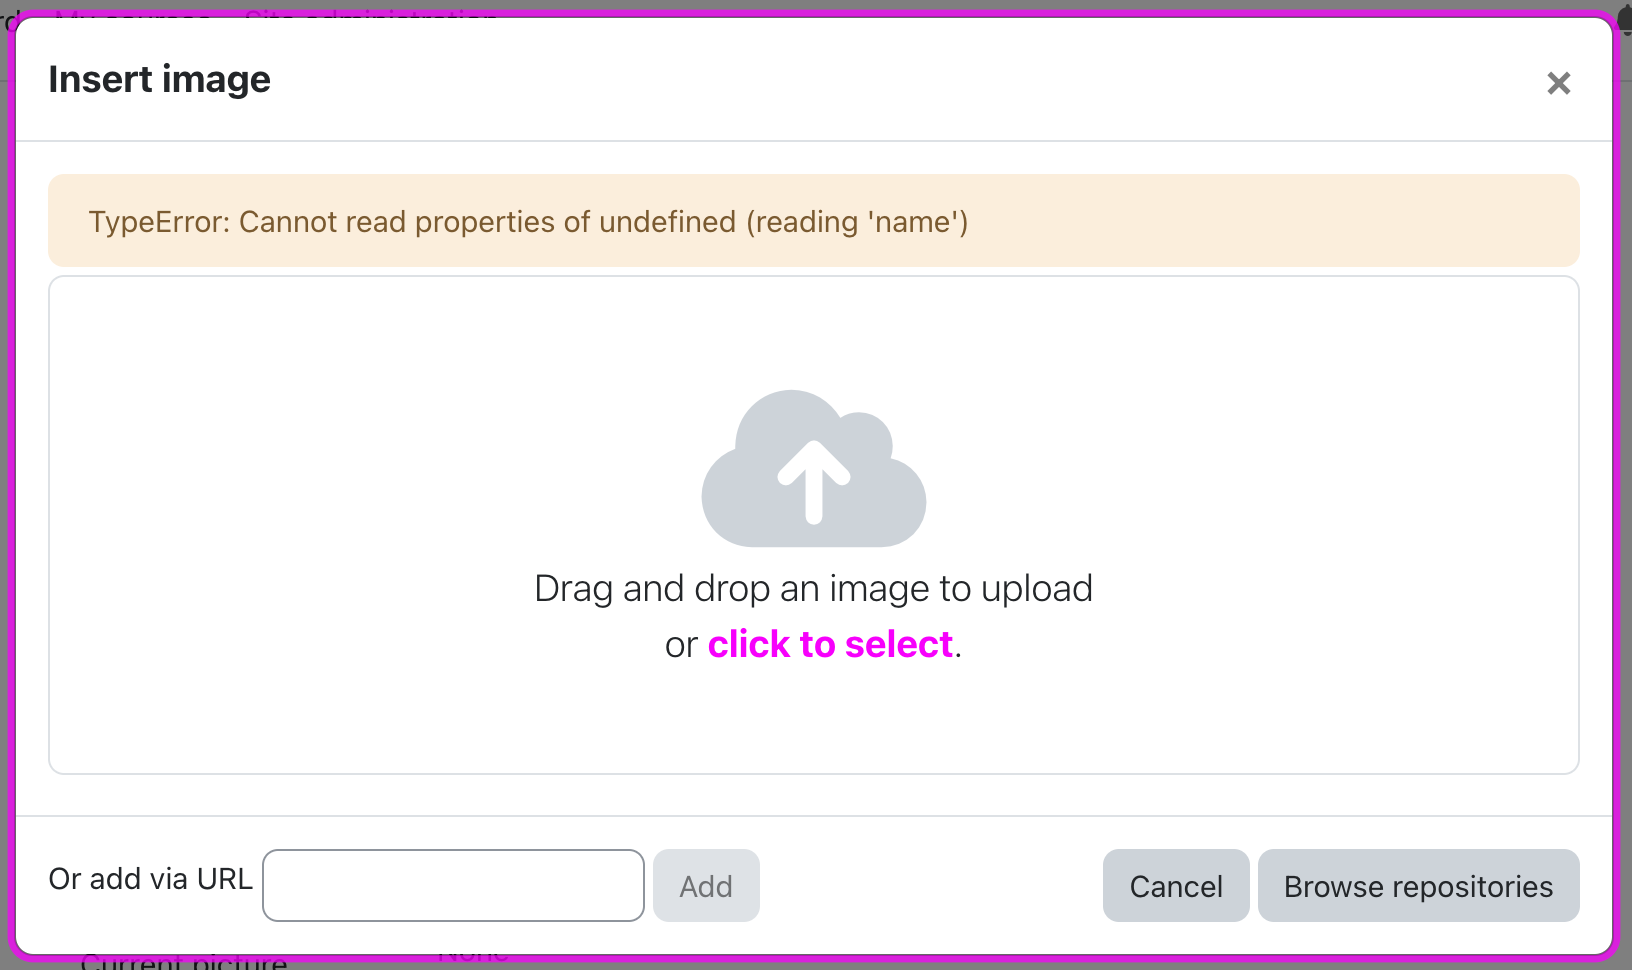
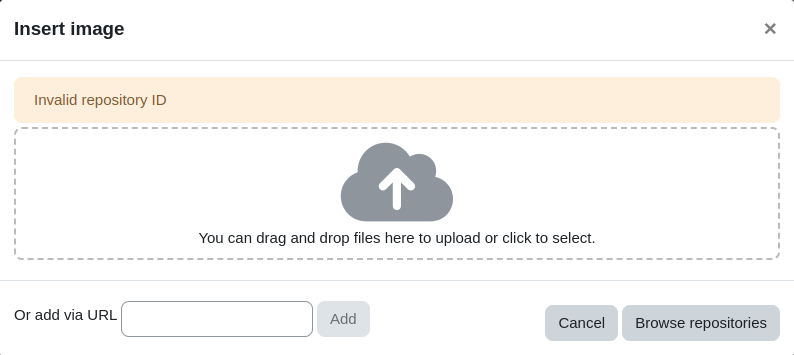
- If the file is not an image, you will see a warning message stating that the file type cannot be accepted.
- Return to your OS file manager.
- Click and drag an image file to the drag-and-drop zone.
- You will see a preloader icon indicating the uploading progress in percentage.
- Once the upload reaches 100%, you will see a loading icon.
- Once the loading is complete, you will see the image details.
- Click on the trash icon to delete the uploaded file.
- Verify that you are returned to the initial view.
Testing 4: Insert external image URL (Continue from Testing 2)
Here are the steps to add an external URL to an image in TinyMCE editor:
- In the "Or add via URL" input, paste 'https://placehold.co/600x400.png'
- Wait for the loading icon to disappear
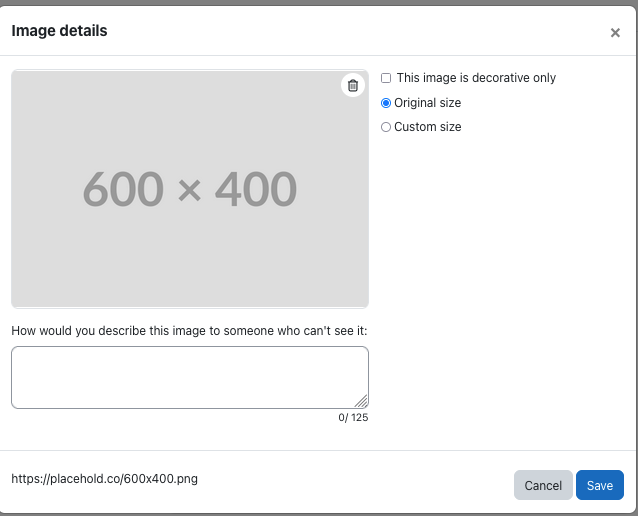
- Check if the image details appear
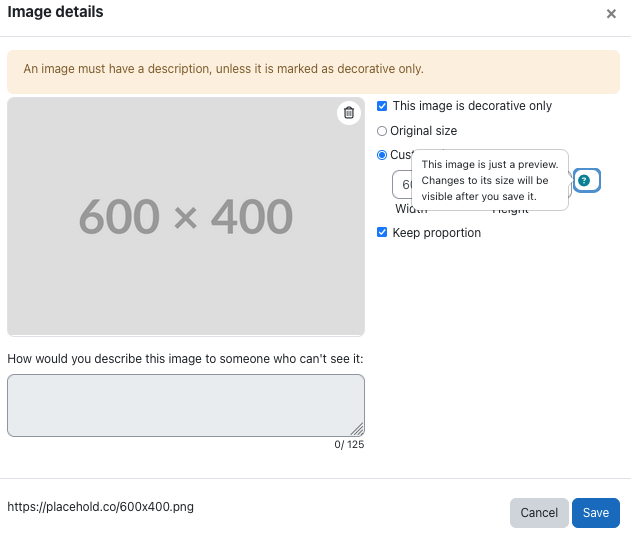
- Verify that there is a single pixel border around the image, using the standard grey and round corners.
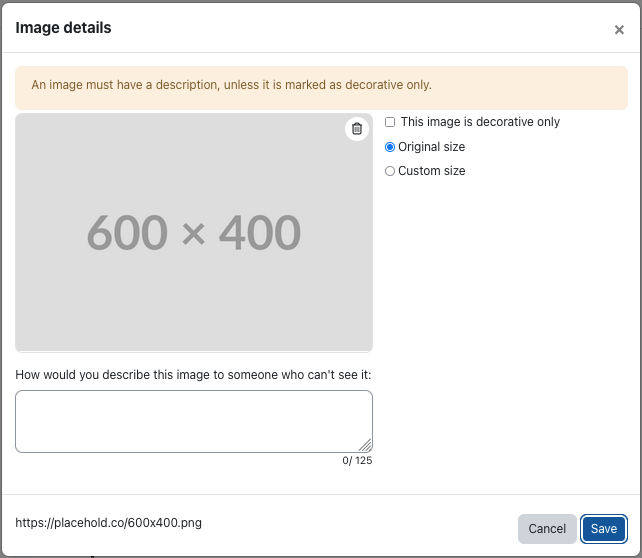
- Click on the Save button
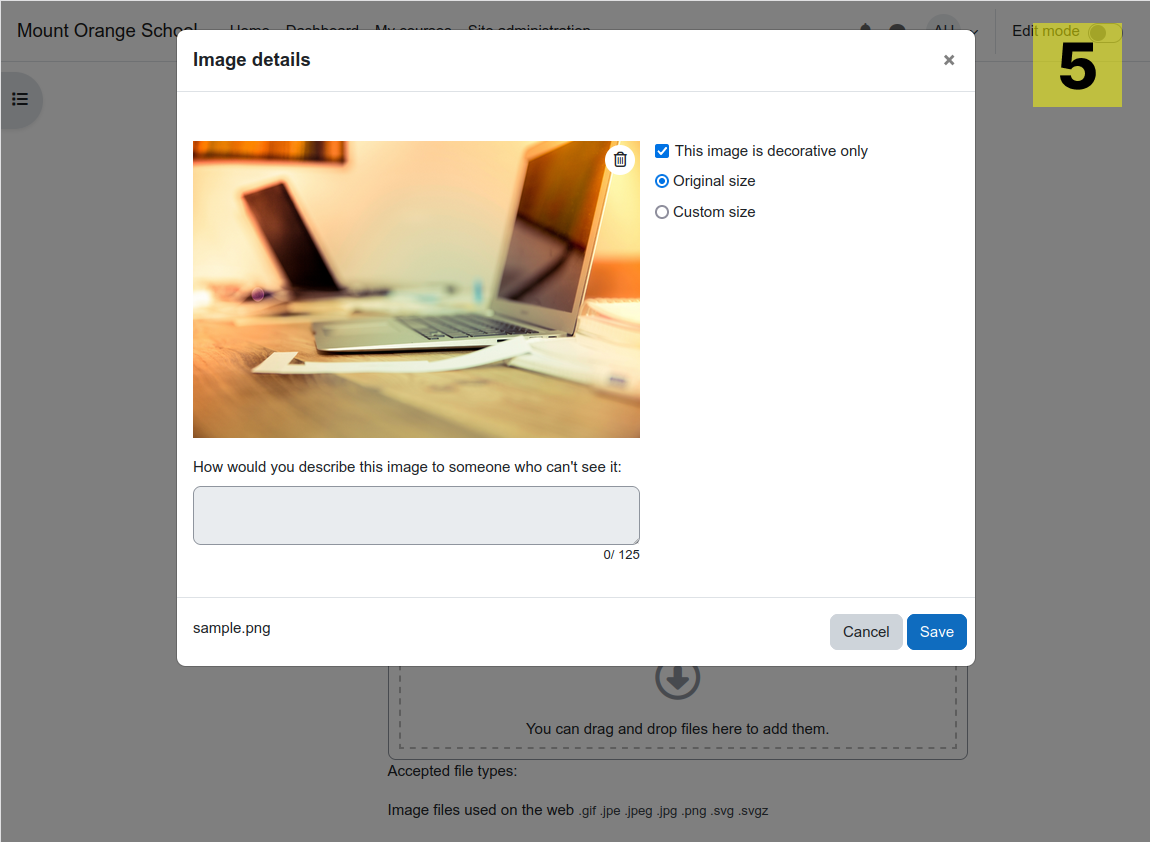
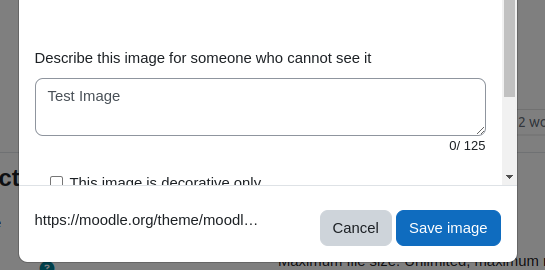
- Verify that the warning message "An image must have a description unless it is marked as decorative only." appears
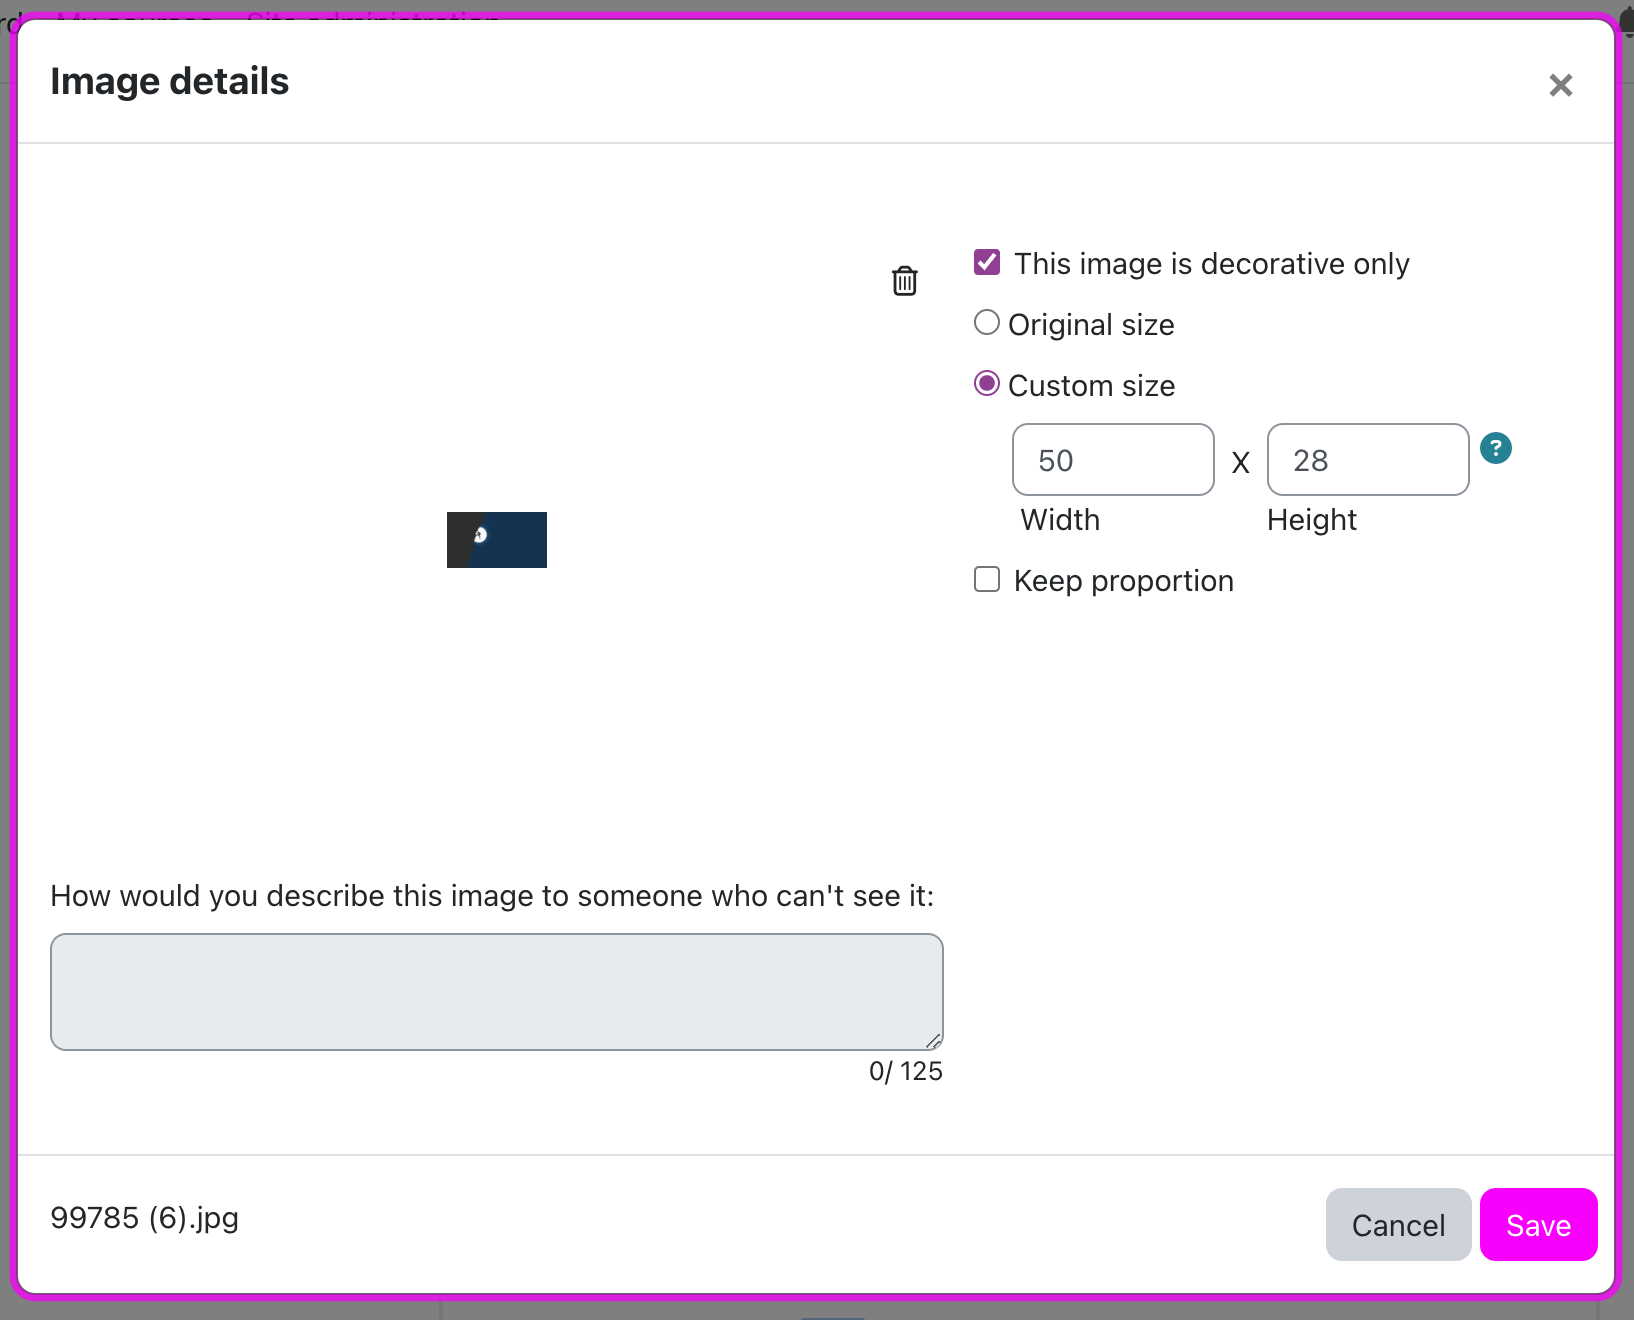
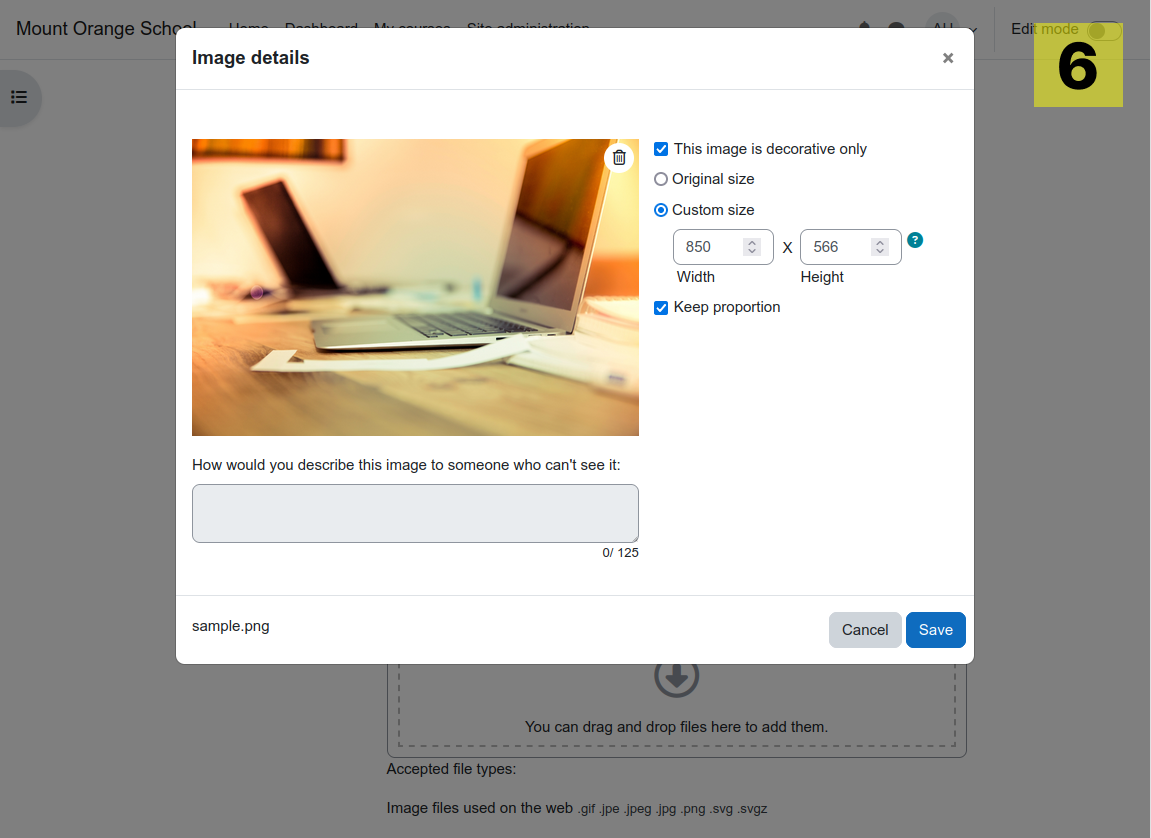
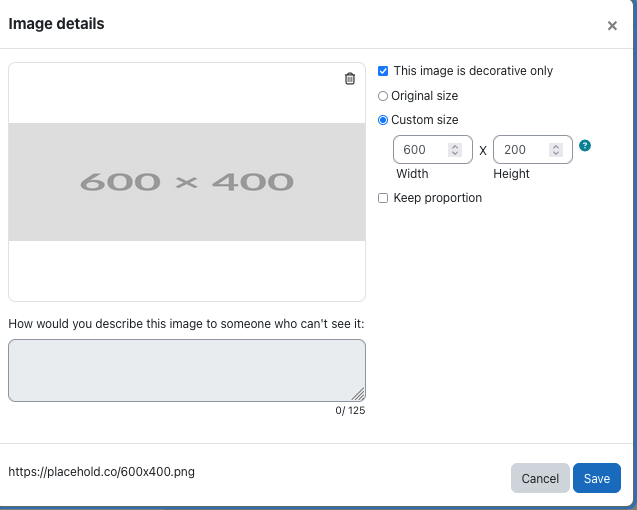
- Tick the "This image is decorative only" checkbox
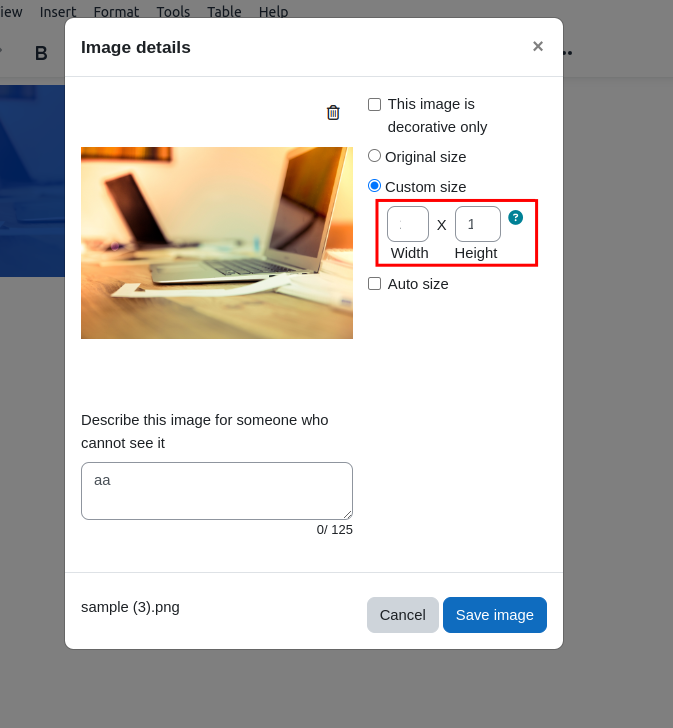
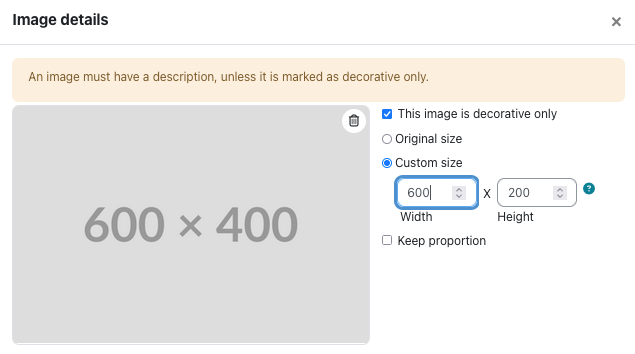
- Select the Custom size radio button
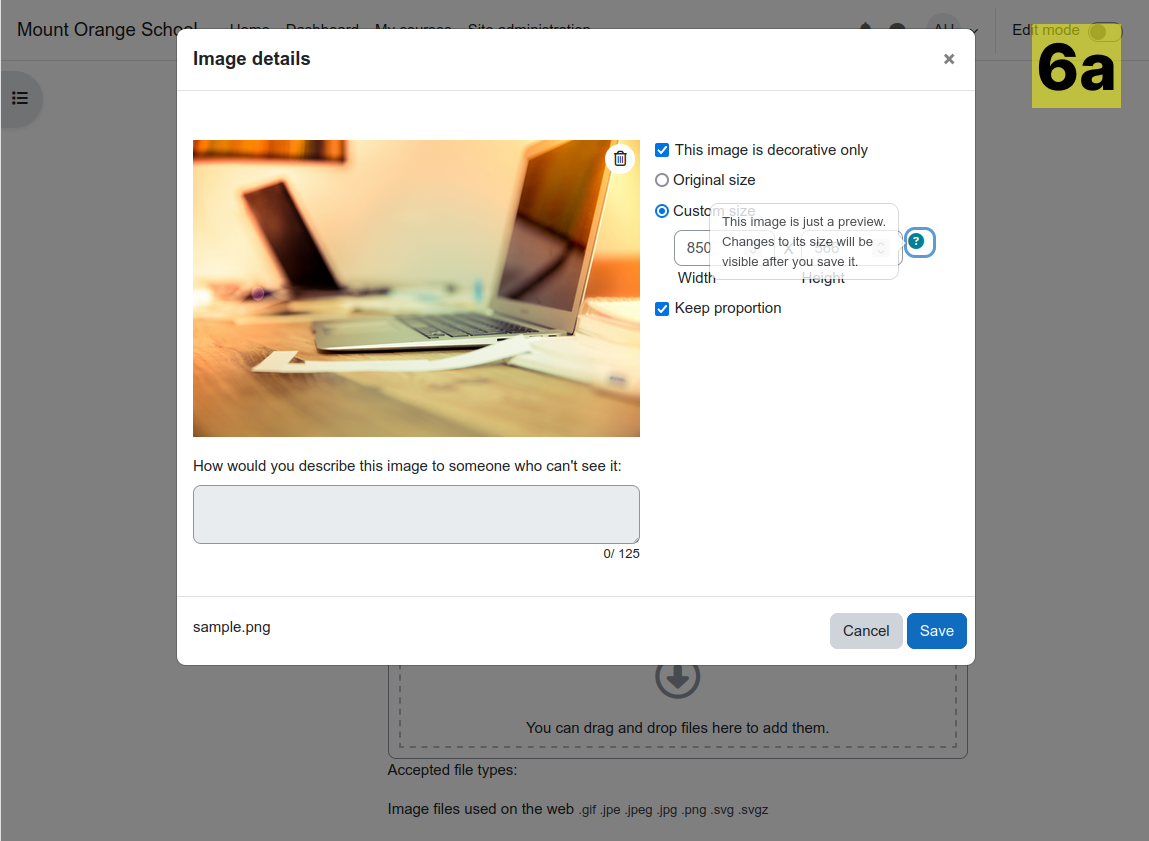
- Verify there is a help icon near the width and height fields.
- Click the help icon
- Verify there is a popup window contains text:
This image is just a preview.Changes to its size will bevisible after you save it. - Verify that the Width input shows 600, the Height input shows 400 and the Keep proportion checkbox is checked
- Change the width to 300
- Verify that the height automatically changes to 200
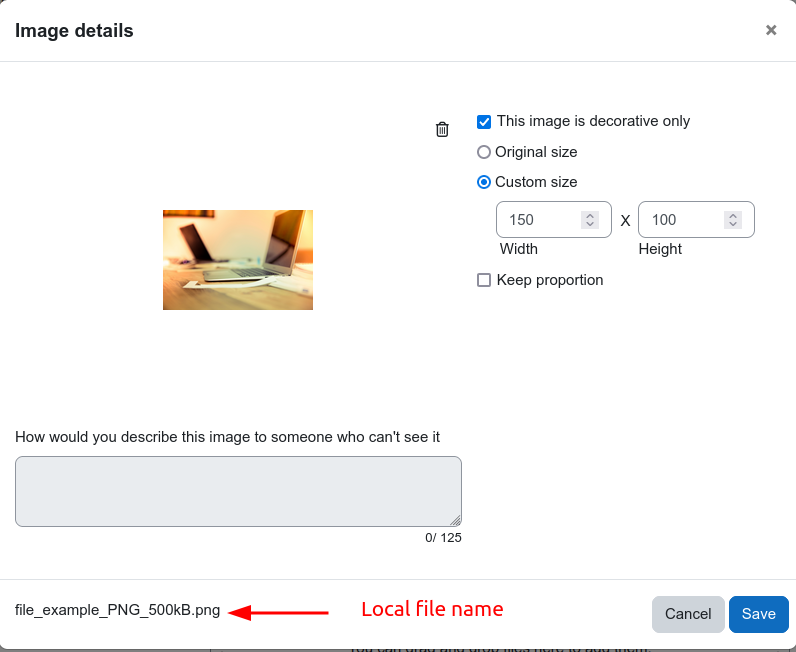
- Uncheck the Keep proportion checkbox
- Change the width to 600
- Verify that the height remains at 200
- Click the Save button
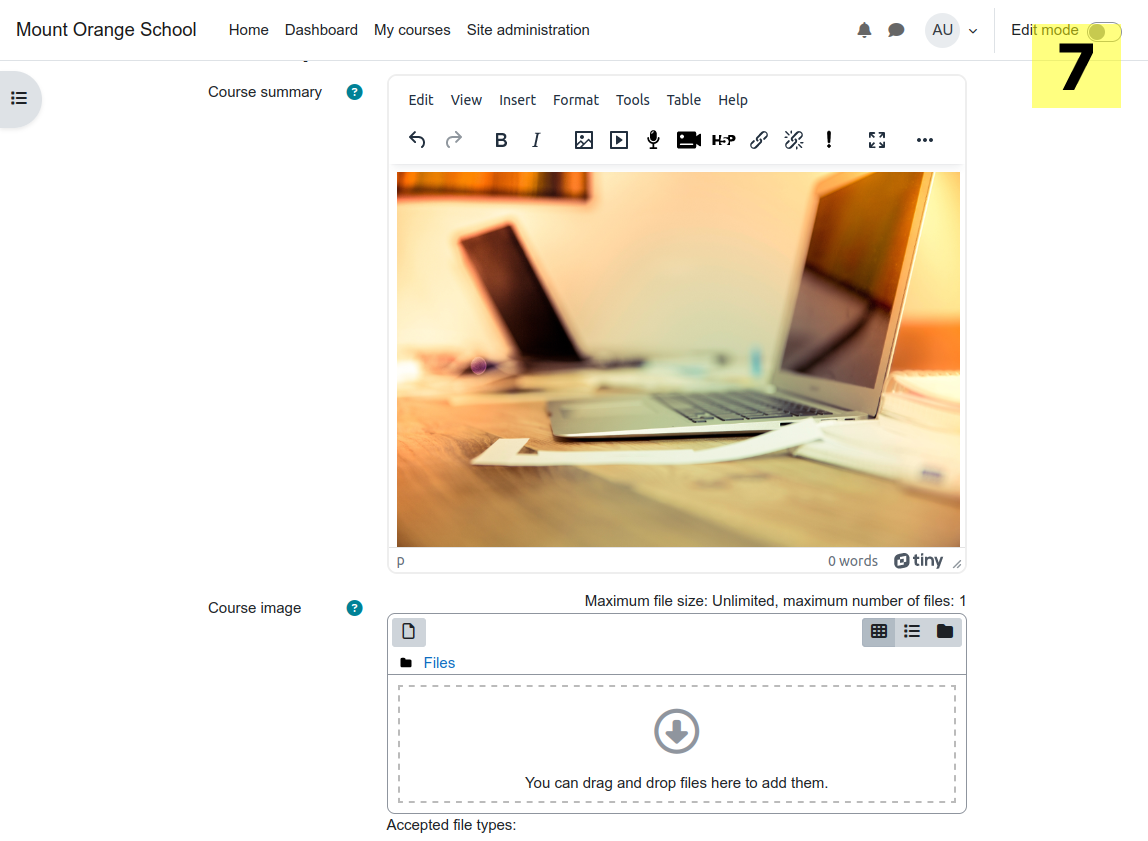
- Check if the image appears in the TinyMCE editor with the exact size we set
- Click on the image and then on the Image icon on the toolbar
- Make sure the image details appear with the Custom size radio button selected and the same width and height
- Click on the Save button.
- Verify the image appears in the editor.
To ensure seamless testing, I am providing a sample image and PDF file to be used during the testing process. Image: sample.png PDF: sample.pdf Testing 1: Repositories Here are the steps to follow for the TinyMCE Image works with repositories: Log in to your account as the admin user. Navigate to the Site Admin > Plugins > Repositories > Manage repositories. Set the "Enable and visible" value to the Upload a file and Wikimedia repository and let the rest disabled. Navigate to the Edit Profile page. In the description editor toolbar, click the image icon Verify that there is an icon and text "You can drag and drop files here to upload or click to select." and the browse repositories button Navigate back to the Site Admin > Plugins > Repositories > Manage repositories. Disable the Upload a file repository Navigate back to the Edit Profile page. In the description editor toolbar, click the image icon Verify that there is an icon and text "Paste an image link in the field below or click the Browse Repositories button." and the browse repositories button Navigate back to the Site Admin > Plugins > Repositories > Manage repositories. Disable the Wikimedia repository Navigate back to the Edit Profile page. In the description editor toolbar, click the image icon Verify that there is an icon and text "Paste an image link in the field below." and there is no browse repositories button. Testing 2: Click anywhere inside the drag-and-dropzone Here are the steps to follow for uploading an image: Log in to your account as the admin user. Navigate to the Edit Profile section. Click on the "Image" icon in the toolbar located in the description field. Verify that a drag-and-drop zone with the following message appears - "Drag and drop an image to upload or click to select". Open the Web developer tools and navigate to Network. Select "Regular 3G" from the Throttling dropdown. Click anywhere in the drag-and-drop zone. Verify that you are prompted with the native OS file picker. Ensure that you only see files with the image type, such as *.jpg or *.png. Select an image. Verify that you see a preloader icon with uploading progress in percentage. After the progress hits 100%, verify that you see a loading icon. After the loading is done, verify that you will see the image details. Look for a trash icon on the top right of the image preview box and click it. Verify that you are returned to the initial view. Testing 3: Drag and drop from the OS file manager (Continue from Testing 1) Here are the steps to follow for uploading an image: Open your OS file manager, such as Files, Finder or Explorer. Click and drag a non-image file, such as a PDF, to the drag-and-drop zone. If the file is not an image, you will see a warning message stating that the file type cannot be accepted. Return to your OS file manager. Click and drag an image file to the drag-and-drop zone. You will see a preloader icon indicating the uploading progress in percentage. Once the upload reaches 100%, you will see a loading icon. Once the loading is complete, you will see the image details. Click on the trash icon to delete the uploaded file. Verify that you are returned to the initial view. Testing 4: Insert external image URL (Continue from Testing 2) Here are the steps to add an external URL to an image in TinyMCE editor: In the "Or add via URL" input, paste ' https://placehold.co/600x400.png' Wait for the loading icon to disappear Check if the image details appear Verify that there is a single pixel border around the image, using the standard grey and round corners. Click on the Save button Verify that the warning message "An image must have a description unless it is marked as decorative only." appears Tick the "This image is decorative only" checkbox Select the Custom size radio button Verify there is a help icon near the width and height fields. Click the help icon Verify there is a popup window contains text: This image is just a preview. Changes to its size will be visible after you save it. Verify that the Width input shows 600, the Height input shows 400 and the Keep proportion checkbox is checked Change the width to 300 Verify that the height automatically changes to 200 Uncheck the Keep proportion checkbox Change the width to 600 Verify that the height remains at 200 Click the Save button Check if the image appears in the TinyMCE editor with the exact size we set Click on the image and then on the Image icon on the toolbar Make sure the image details appear with the Custom size radio button selected and the same width and height Click on the Save button. Verify the image appears in the editor.
-
10
-
Team Hedgehog 2023 Sprint 3.2, Team Hedgehog 2023 Sprint 3.3, Team Hedgehog 2023 Review 3, Team Hedgehog 2023 Sprint 4.1, Team Hedgehog 2023 Sprint 4.2, Team Hedgehog 2023 Sprint 4.3, Team Hedgehog 2023 Review 4, Team Hedgehog 2024 Sprint 1.1, Team Hedgehog 2024 Sprint 1.2, Team Hedgehog 2024 Sprint 1.3, Team Hedgehog 2024 Sprint 1.4
We want to improve the user experience of adding an image in TinyMCE. Some of this work will need to be done as part of the larger project to improve the filepicker. However, there are some initial steps that can be done to improve things now.
The first step will be to do some UX and UI design. - Done
Refactor the existing image component of the media plugin for Tiny (lib/editor/tiny/plugins/media) to support the new workflow.
This plugin is logically separated between image adding and media adding. Changes to the media side of the plugin are out of scope for this work (but will likley be done at a future stage).
Implement the workflow outlined in the Figma design: https://www.figma.com/file/2R4VCwHC2tI4uEs2DfSJNg/Insert-Image--MDL-78096?type=design&node-id=222%3A326&t=APrjDCqsliAjJviz-1
Implementing this feature will start to separate common file adding methods from the existing repositories and file manager functionality
Notes:
- The Add button in screenshot 2 should be disabled until there is a valid URL in the associated field
- The "click to select" link (screen shot 2), should open the native OS file picker screenshot 3
- Picking a file from the native OS should upload it and and return a "Draft file" instance* shown in screenshot 4
- Dragging and dropping an image in the drop area should upload it and and return a "Draft file" instance* shown in screenshot 4
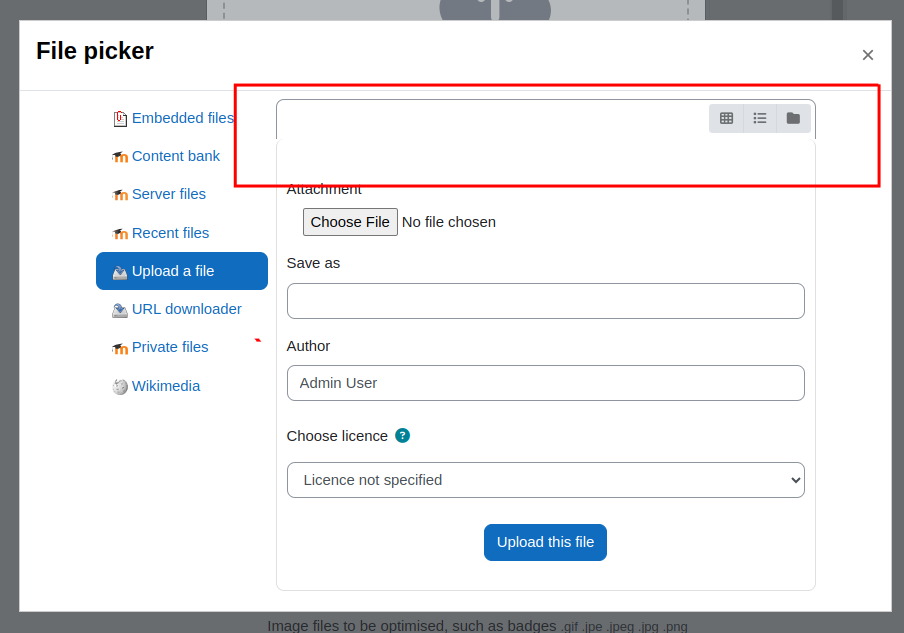
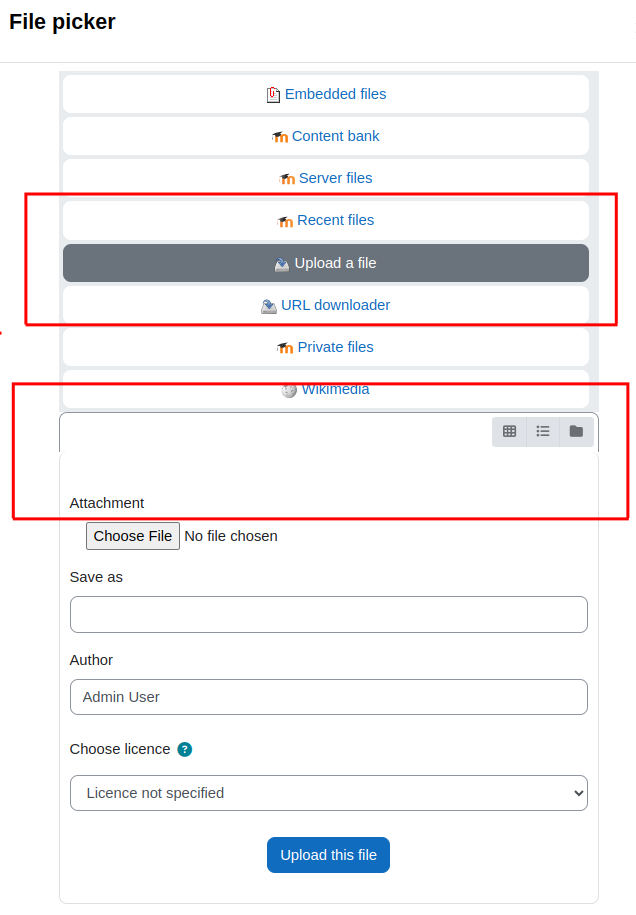
- Clicking the browse repositories button should open the existing repository modal and the work flow there remains the same. With the result of choosing a file from the repository being a "Draft file" instance shown in screenshot 4
- TinyMCE already supports dragging and dropping upload of images, when they are dragged into the editor area
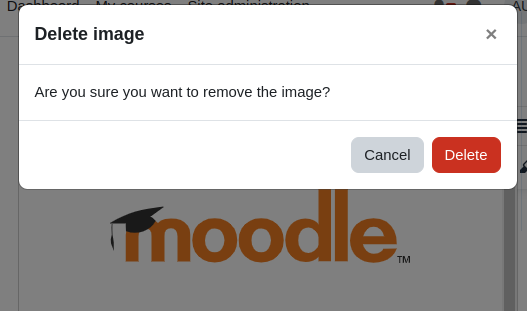
- The small "trash can" icon in the top right (screen shot 4) should remove the image and go back to the first upload screen
- To be clear this won't touch the existing file picker/file manager only the TinyMCE media plugin
*We may need to consider a loading version of drag and drop screen to handle for slow image uploads.
==========================
Additional notes during sprint review (Oct 30th, 2023)
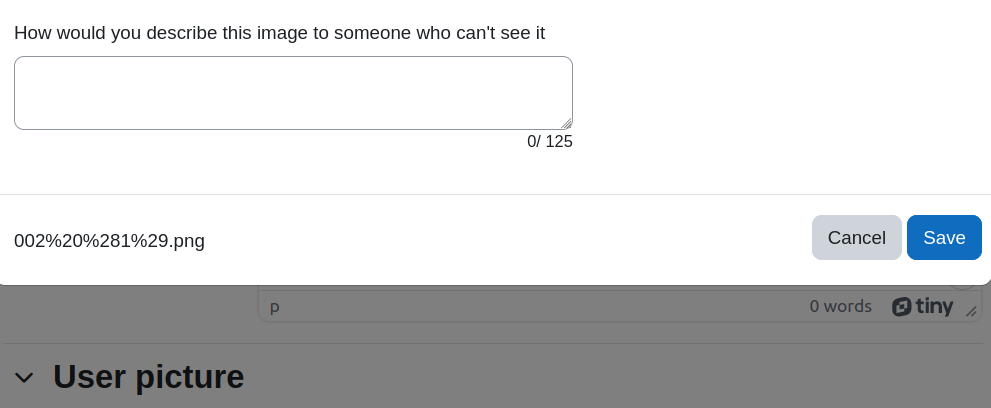
- The file name and URL in the Image Details section should be displayed in text format.
- The preview of the image should be visible without requiring the user to scroll.
- The delete icon is currently inaccessible. suggestion, adding a circle shape as a background for the icon to make it more noticeable.
- If the browse repository is disabled, we need to provide a suitable design for this scenario.
Significant changes
1. The preview image will not resized when the width and height are changed. We decided that it doesn't resize it anymore. Please see it in the comment https://tracker.moodle.org/browse/MDL-78096?focusedId=1043978#comment-1043978
- blocks
-
MDL-80891 AI placement - Text Editor (image and text)
-
- Closed
-
- caused a regression
-
MDL-81556 Missing lang string "filename" from tiny_media
-
- Closed
-
-
-
- Closed
-
-
-
- Closed
-
-
-
- Closed
-
- has a non-specific relationship to
-
-
- Open
-
- has to be done before
-
-
- Open
-
- is blocked by
-
-
- Closed
-
- is parent of
-
-
- Open
-
- Testing discovered
-
-
- Closed
-
-
-
- Closed
-
-
-
- Closed
-
- links to
